How Do I Create a Flowchart?
The button to create resources is located in the left-hand side of the top menu on GoConqr. Click on it and select the Flowchart option. You’ll then be brought straight to a blank Flowchart canvas.
Creating your flowchart
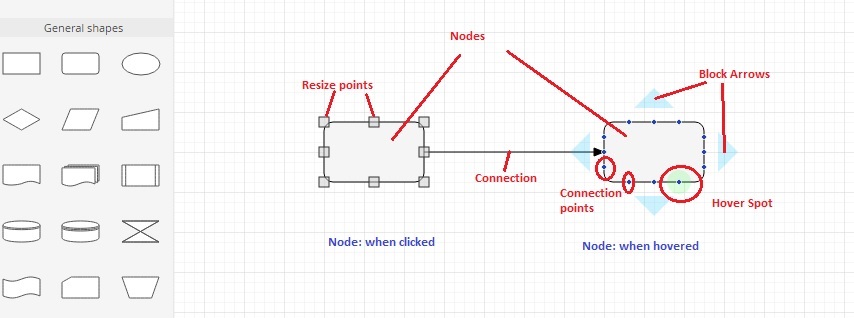
- Drag and drop a shape from the left hand side, then hover over it and blue block arrows will appear around it.
- (a) Click an arrow and a node of the same shape will appear, or (b) Type some text/or change colour the colour of the node, using the formatting bar on the top.
- Once you have more than one shape (either from the blue block arrows or another drag and drop), hovering over will also show small blue connection points. Hover over and click on a connection point to drag a connector arrow to the connection points on another shape.
Adding and formatting text
Add text by clicking on a node, or by dragging a text box from the left hand side. You can format the text using the buttons on the left side above the grid.

Advanced features
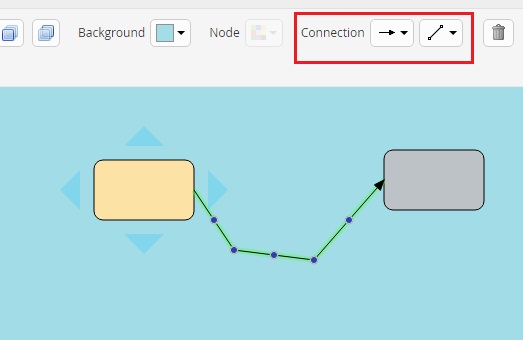
You can copy and paste or send nodes, images, or connection arrows to the back or front of your flowcharts using these buttons:
![]()
You can also change the colour of nodes or the flowchart background. You can change the shape of and direction of the connections, and you can change the pathway of the connection, by clicking on the connector and moving the blue dot.
You can add images to your flowchart and place them in a node if you would like to connect them.
Actions
You can share, copy, print and edit flowcharts in the same way as other GoConqr resources, by clicking the actions icon. ![]()
You can view an example of a flowchart here.