
Year 5 SCIENCE CLUBS CHEMISTRY Flashcards on Chemistry Part One: Class Nine - Saponification, created by cecilia valente on 12/11/2023.

|
Created by cecilia valente
almost 3 years ago
|
|
Close
|
|
Created by cecilia valente
almost 3 years ago
|
|
You will need:
* one soap mould for each team
* 100 gr of soap base per team chopped in small pieces
* food colouring (liquid)
*pipettes
* glitter (facultative)
* essential oils
* spoon to stir
* Labelled paper bag
* Pyrex or glass jar - one per team
* access to a microwave oven
Step One: put the 100gr soap base in the Pyrex/jar
tell them each team member will have a job, so no need for quarrelling.
Each team needs to choose:
a) an artist: the person who chooses the mould (and therefore the shape of the soap)
b) the one who acts as the eye: to choose the colour
c) the one who acts as the nose: chooses the scent
Step Two: add one pipette of the chosen food colouring (they can add more after it has been melted, if they like) in the Pyrex/jar, add 15 drops of the chosen scent
one spoon full of glitter (the smallest one)
Step Four: while the soap melts in the microwave, place the moulds AWAY from your pupils' reach and one next to the other.
Step Six: hand over the paper bags and ask them to write their names on the paper bag and move on with the theory
Step Eight: So far, we have witnessed chemical reactions involving acids and alkalis in water, today we see a different type of reaction; saponification or the making of soap.
SAPO is the Latin word for soap
Step Nine: soaps can remove water and destroy germs because of its structure.
Draw it on the while board
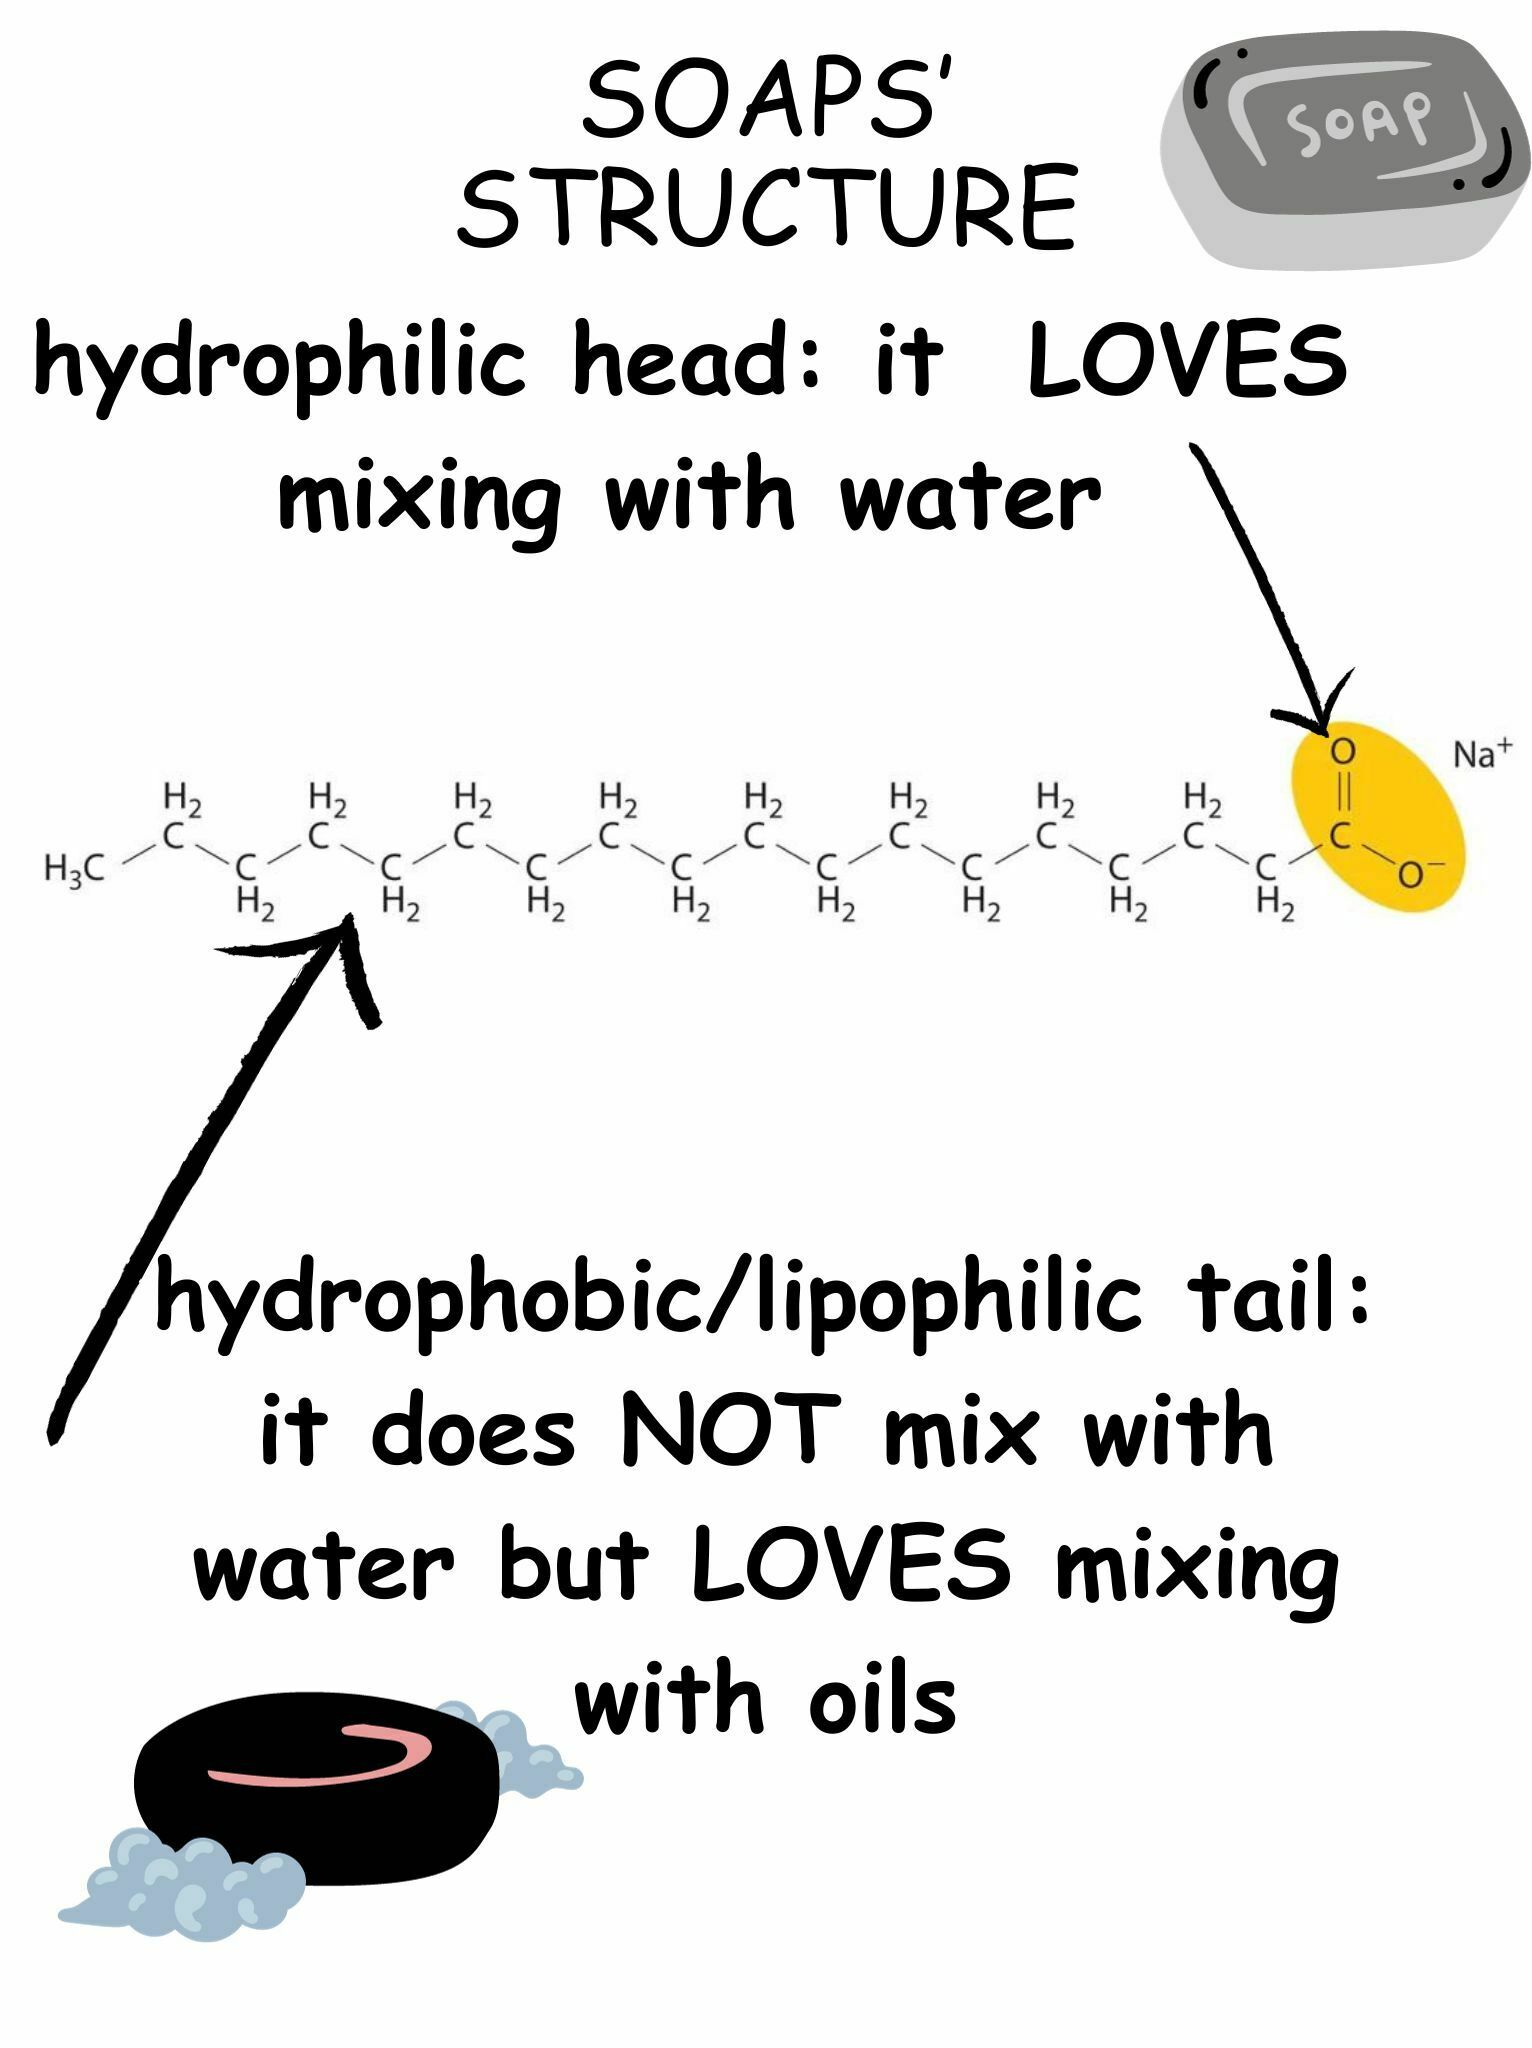
Step Ten: This is how it works: the head gets the soap molecules safely in water but the tail, does not like water and it will attach itself to the oily, grimy dirt. Do you remember the class about density; did water and oil mix? (A: no, they have different density)
Step Eleven: now play the soap video in the video section, while they watch you pop the soap out of the moulds, but leave them on the moulds so you know which soap belongs to which group.


