The react-redux library
Now it's time to make these things actually matter and put them into practice! It's time to connect redux with a react application and components.
Well actually we will do exactly the same as before, but now with react.
In a new folder use the create-react-app script in order to generate a react application. After pruning and cutting or deleting the unnecessary code, start by creating a file inside our src folder, named redux.js.
We need first to install 2 packages, redux and react-redux which is the module that connects redux state management's functionality with react components. Do it from NPM.
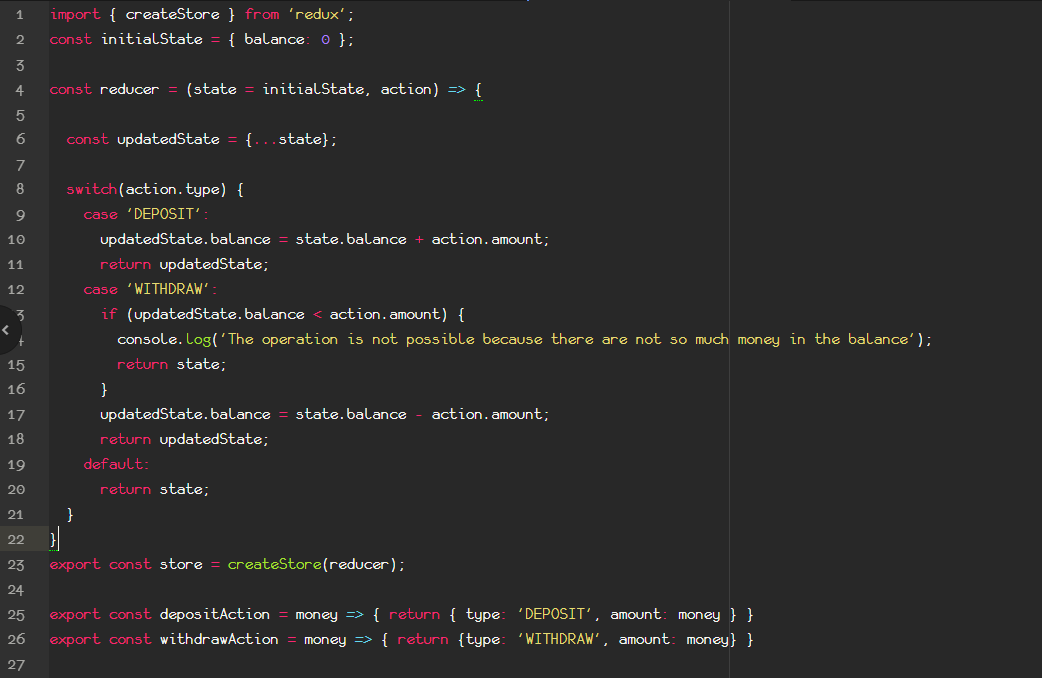
This is going to be the place where we again create our store, with tons of similarities as before but also some differences. Let's take a look.
First of all we need to import the createStore function from redux the ES6 way (no node.js require method is applied here, this is going to be executed by the browser remember!).
Other than that all the other aspects remain the same!
We initialize state, we pass it as a default parameter to our reducer function that accepts couple of actions and executes accordingly, by updating the state. We make a copy of the state on top of the reducer and we always return a state after each case.
Directly after we create our store, by using the imported createStore function, and passing the fresh created reduce function as the only parameter.
As usually at last we define couple of action creators functions, that return an object with the type parameter and the deposit amount, or the withdraw amount respectively.
We don't need to make dispatch here, as these functions will be executed directly from a react component on a click event. We will see how later.
