
Apuntes
Using GoConqr's Course Builder
Contenido del apunte (7)
Página 1
GoConqr Course Builder
Course Builder is an authoring tool that allows you to integrate and organise your learning resources and media in one place.
Courses allows you to sort your learning or training material sequentially and store resources – whether Mind Maps, Notes, Flashcards, Slides, Flowcharts or Quizzes – in a single package. You can share the courses you create with the members of any Group of which you are an administrator, or share the link with friends. Users with Smart Links can share their Courses with people who are not GoConqr members, or who are not logged in.
Because you can access the GoConqr public library in addition to using our content creation tools, it's easy to create a great Course in a matter of minutes.
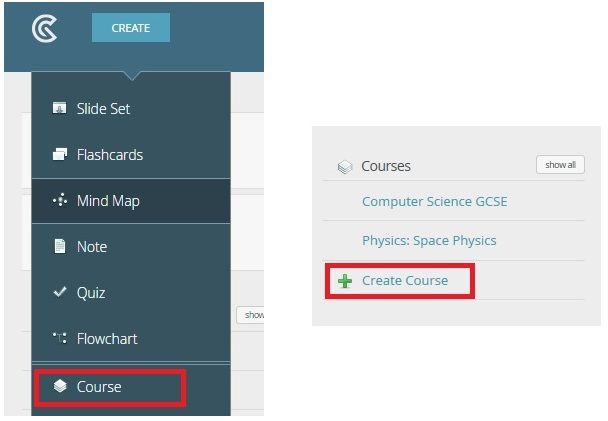
To start creating a Course, you can:
Click Create at the top of the page, then select Course
Click Create Course on the Left Hand Side of your page
Página 2
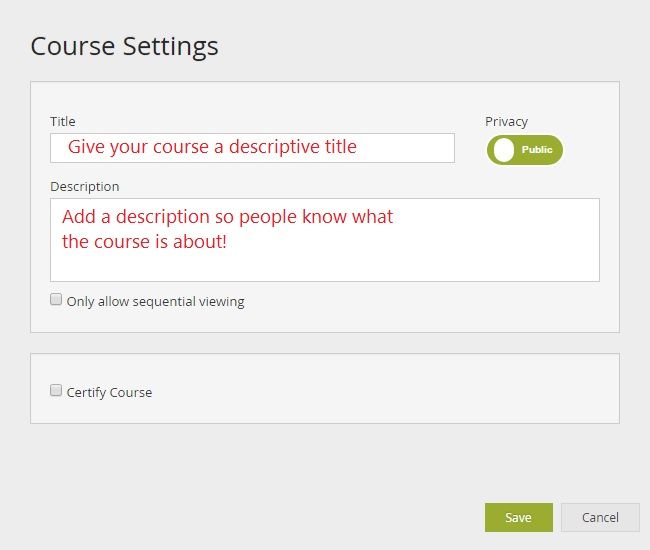
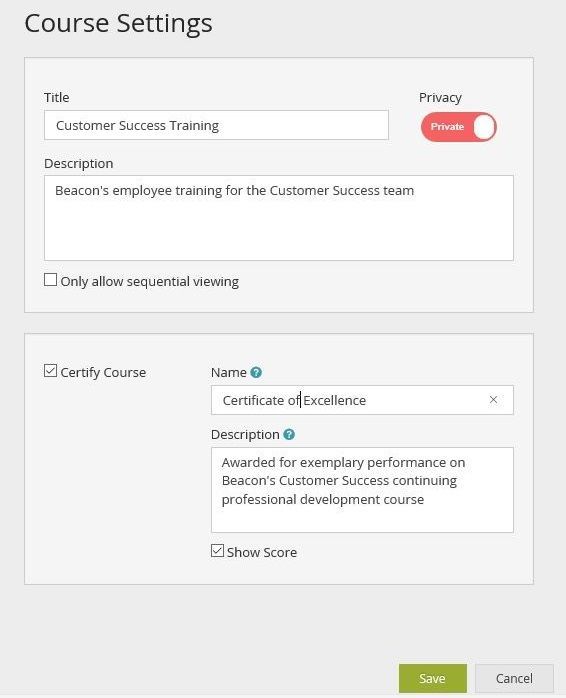
Course Settings
Give your Course a descriptive title and a clear description - this is particularly important if you want people to be able to search and find your course on GoConqr.
You can choose to make your Course Private if you have a Premium Account.
Check the box 'Only allow sequential viewing', if you would like all your users to complete a module before progressing to the next module.
Certify Course is a setting in GoConqr Campus which allows users with the appropriate permissions to award a certificate for satisfactory Course Completion.
You can change these settings at any time by clicking on the tag next to the course title when in edit mode.
Página 3
Selecting Templates and Adding Resources
Select a Module to add content to your Course. You can choose text only, media only, or resource only. If you prefer, you can combine text with media or a resource in the one module.
Adding Resources
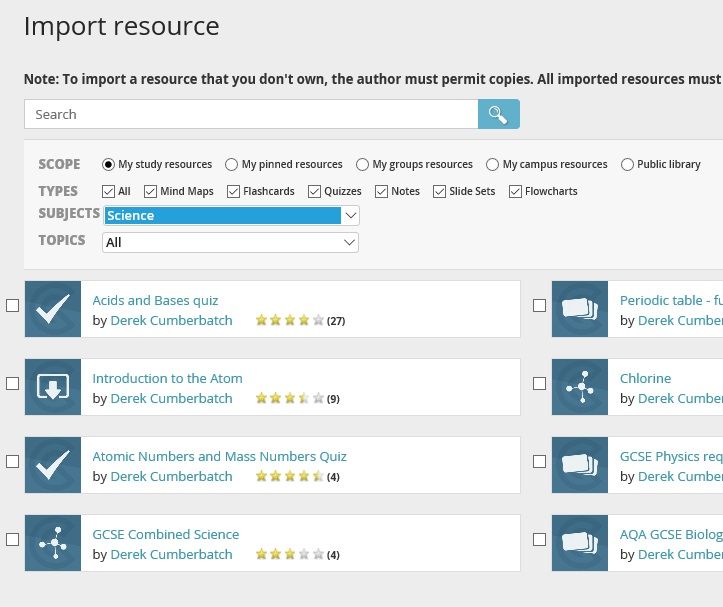
One of the great advantages of using GoConqr to create a Course is that you can use content from our public library. Click to import a resource and simply enter a search term. You can then refine the results by resource type - Flashcards, Mind Maps, Flowcharts, Quizzes, Slides and Notes.
You can also limit your search to your own resources, or easily find the resource you are looking for by searching your subject folders.
Página 4
Adding Media
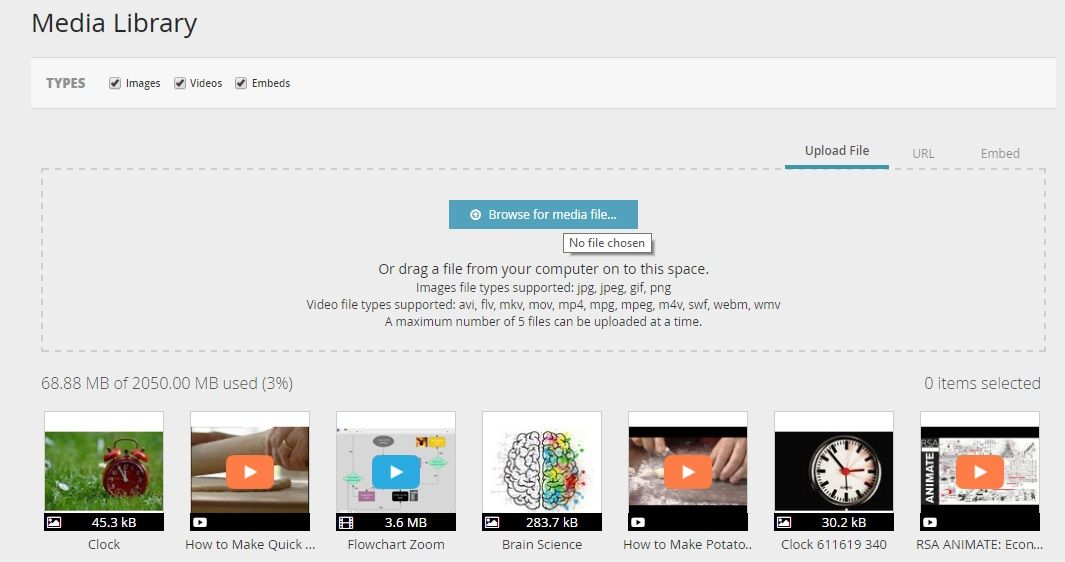
You can add media including videos and images to your Course. You can upload video directly to your Media Library, or embed video from a third party site, such as YouTube or Vimeo.
You can add content directly to your Media Library at any time, or if you add media when creating a Course, it will be automatically added to your Media Library for you to reuse as you choose.
Media supported:
Images: jpeg, jpg, gif, pngVideos: avi, flv, mkv, mov, mp4, mpg, mpeg, m4v, swf, webm, wmv
Embeds: YouTube, Slideshare, SoundCloud, Vimeo
Coming soon: PDFs, Audio…
Página 5
Managing Modules
After adding your template you will see the module appear on the left hand side index.
You can hide this index at any time, by sliding it to the left. Modules with resources will be named after the resource, and modules with media will be named after the media file title. Modules with text only, or that you have not yet added media or resources to, will be untitled by default.
Organising your Course and Managing ModulesYou can re-arrange modules by dragging and dropping in the index on the left hand side. Clicking Manage Modules gives you more options:
Rename Modules – by clicking and editing the name
Promote to Header – this makes the module appear bold in the index and is often used for dividing sections of a course or sharing instructions
Add a Score weight – for modules with resources you can add a weight to the module, if for example one quiz is more important than others. By default all resources are weighted = 1.
Progression Score – In a sequential course you may add a minimum score to flashcards and quizzes that a user must achieve in order to progress.
Change template type – you may change the layout of the module, provided the content still fits (e.g. you can put media above resource instead of media below resource)
Delete – check the box here if you wish to delete any modules
Once you have made all the desired changes, click ‘Save all changes’ to return to the main course editor. When you are finished creating the course close it by simply clicking the x in the top right hand corner of the page. The Course will be available on the left hand side of your activity feed.
Página 6
Sharing, Reporting and Deleting a Course
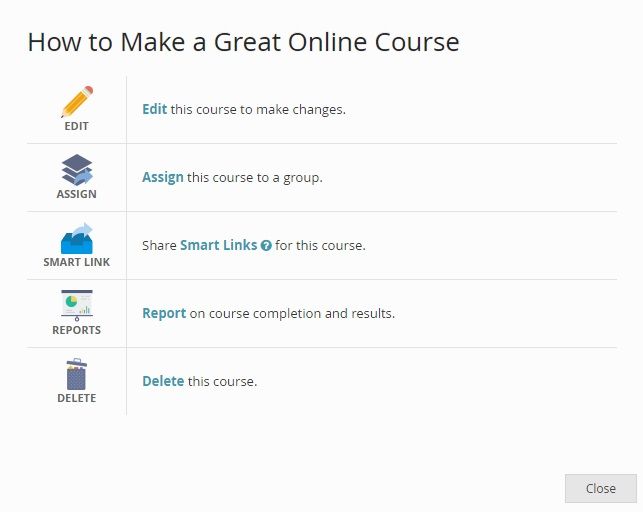
In your own Course, clicking Actions will allow you to do the following:
Edit - make changes
Preview - see how the Course will look to other users
Assign the Course to a Group that you are an administrator of (set a time and date)
Share Smart Links - this is a special feature which allows you to share the course privately with users who are not on GoConqr or are not logged in
Reports - this is a GoConqr Campus feature which allows you report on the results for users who have taken the course
Delete - removes the Course from GoConqr
You can also copy the URL (link) of the course to share with a user
Página 7
Course Certificates
If you are part of an institution which has a GoConqr Campus plan, you may be eligible to receive a certificate for Courses you have taken, or to award certificates for courses you have created.
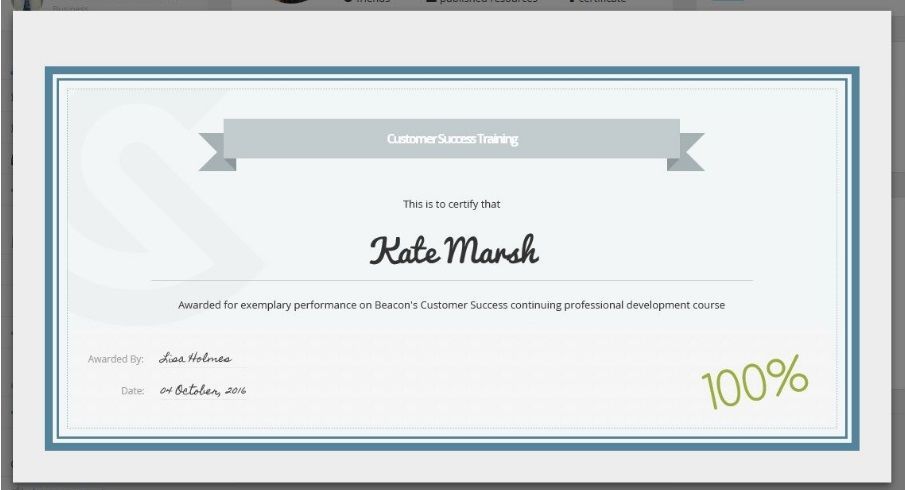
If you have the Course Certification permission, you can provide a certificate to users in your Campus on satisfactory Course Completion. Simply create a Course as usual. In the settings, select Certify Course and fill in the information that you would like to appear on the certificate.
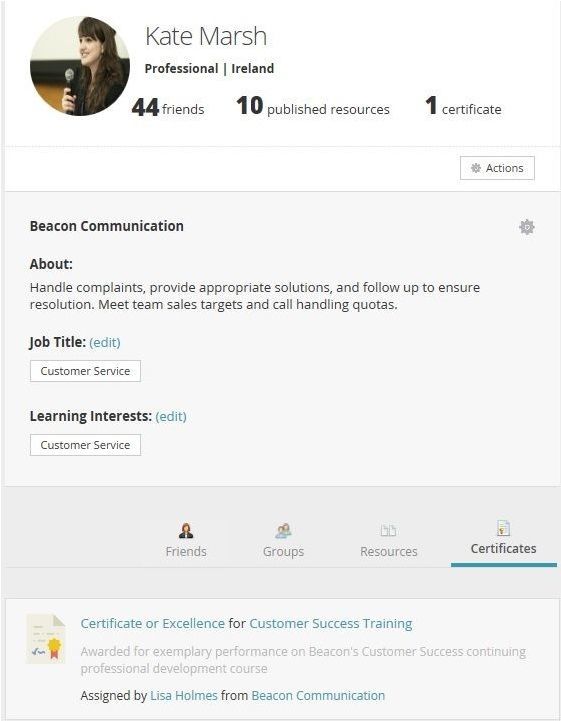
A preview will appear on the profile of a user that successfully completes the course, and this will open to a full certificate.
Información
- Descripción
- A guide to using GoConqr's Course Builder to create and share online courses
- Creado por
- Usuario eliminado · abr 2017
- Actualizado
- 21 abr 2017
- Visitas
- 535
- Etiquetas
- Historial
-
- Creado por Sarah Egan · 21 abr 2017
- Copiado por Sarah Egan · 21 abr 2017
- Valoración