
Mapa mental
Windows Server 2012 R2 - Chapter 3
Conteúdo do mapa
Windows Server 2012 R2 - Chapter 3
Chapter 3.1 Hyper-V
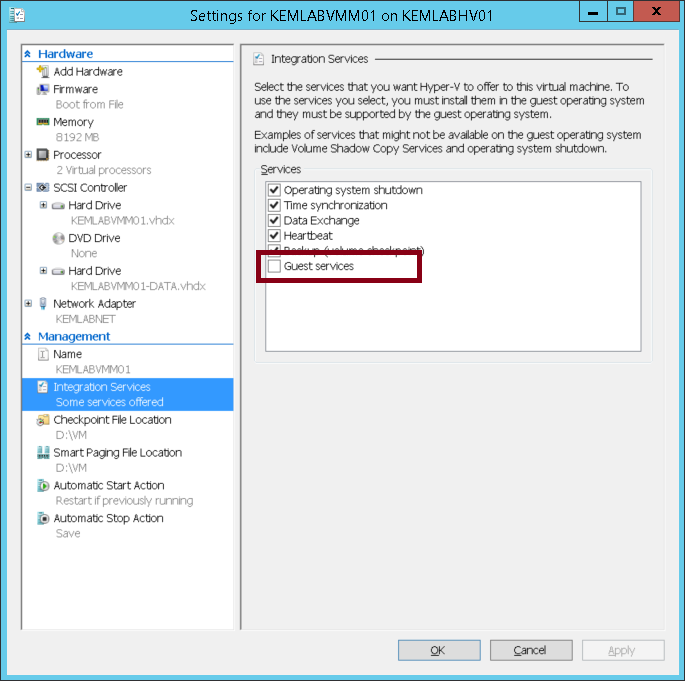
- Guest Integration Services
- Certain Hyper-V guest OS features do not function properly using the OS’s own device drivers.
- which you can install on your VMs for compatibility purposes.
- Operating System Shutdown
- Enables the Hyper-V Manager console to remotely shut down a guest OS in a controlled manner, eliminating the need for an administrator to log on and manually shut the system down.
- Time Synchronization
- Enables Hyper-V to synchronize the OS clocks in parent and child partitions.
- Data Exchange
- Enables the Windows OSs on the parent and child partitions to exchange information, such as OS version information and fully qualified domain names.
- Heartbeat
- Implements a service in which the parent partition sends regular heartbeat signals to the child partitions, which are expected to respond in kind. A failure of a child partition to respond indicates that the guest OS has frozen or malfunctioned.
- Backup
- Enables backup of Windows VMs by using Volume Shadow Copy Services.
- Guest Services
- Enables administrators to copy files to a virtual machine without using a network connection.
- Operating System Shutdown
- which you can install on your VMs for compatibility purposes.
- The Windows Server 2012, Windows Server R2, Windows 8, and Windows 8.1 operating systems have the latest Guest Integration Services software built in.
- Earlier versions of Windows have earlier versions of the Guest Integration Services package that need to be upgraded, however, and some Windows versions do not include the package at all.
- For Linux guest OSs, you must download and install the latest release of Linux Integration Services Version 3.4 for Hyper-V from the Microsoft Download Center.
- Earlier versions of Windows have earlier versions of the Guest Integration Services package that need to be upgraded, however, and some Windows versions do not include the package at all.
- Once you have installed or upgraded Guest Integration Services, you can enable or disable each of the individual functions by opening the Settings dialog box for the VM and selecting the Integration Services page,
- Certain Hyper-V guest OS features do not function properly using the OS’s own device drivers.
- Enhanced Session Mode
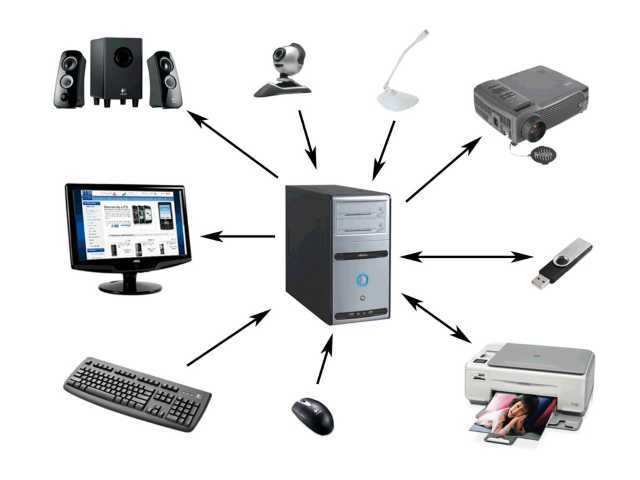
- Hyper-V supports an enhanced session mode that enables the Virtual Machine Connection window to redirect any of the following local resources to VMs running Windows Server 2012 R2 or Windows 8.1
- Display configuration, Audio, Printers Clipboard, Smart cards, USB devices, Drives, Supported Plug and Play devices
- The enhanced session mode works by establishing a Remote Desktop Protocol connection between the host computer and the VM, but it does not require a standard network path because it uses VMBus instead. VMBus is a high-speed conduit between the various partitions running on a Hyper-V server.
- Enhanced session mode is enabled by default in Windows 8.1, but in Windows Server 2012 R2, you must enable it on the Enhanced Session Mode Policy page of the Hyper-V Settings
- Hyper-V supports an enhanced session mode that enables the Virtual Machine Connection window to redirect any of the following local resources to VMs running Windows Server 2012 R2 or Windows 8.1
- Allocating memory
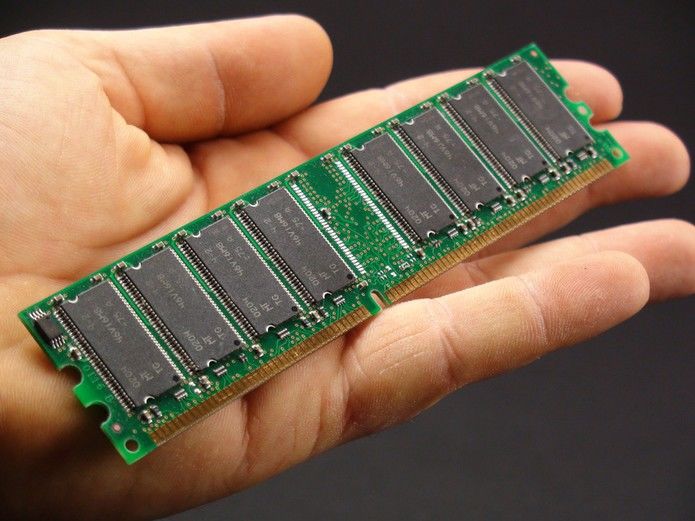
- Dynamic memory enables Hyper-V to adjust the amount of RAM allocated to VMs, depending on their ongoing requirements.
- There is no substitute for memory, so all Hyper-V can do is take the physical memory installed in the computer and allocate it among the various VMs.
- When you create a VM, you specify how much memory to allocate to the VM. Obviously, the amount of memory available for use is based on the physical memory installed in the computer.
- DYNAMIC MEMORY
- use a feature called Dynamic Memory to automatically reallocate memory to the VM from a shared memory pool as its demands change. If a virtualized server starts to experience larger amounts of client traffic, for example, Hyper-V can increase the memory allocated to the system, and reduce it again when the traffic subsides.
- To use Dynamic Memory, you must enable it by selecting the Enable Dynamic Memory check box on the VM’s Memory settings
- Startup RAM
- Specifies the amount of memory that you want to allocate to the VM when it starts. When you are using Dynamic Memory, this value can be the minimum amount of memory needed to boot the system.
- Minimum RAM
- Specifies the smallest amount of memory the VM can use at any time. OSs can require more memory to start up than to run, so this value can be smaller than the Startup RAM value.
- Maximum RAM
- Specifies the largest amount of memory that the VM can use at any time. The value can range from a low equal to the Startup RAM value to a high of 64 GB.
- Memory Buffer
- Specifies a percentage that Hyper-V uses to calculate how much memory to allocate to the VM, compared to its actual utilization, as measured by performance counters.
- Memory Weight
- Specifies a relative value that specifies the priority of this VM compared to the other VMs on the same computer. When the physical memory in the computer is insufficient to allocate the full-buffered amount specified for each VM, the VMs with the highest Memory Weight settings receive priority.
- Startup RAM
- To use Dynamic Memory, you must enable it by selecting the Enable Dynamic Memory check box on the VM’s Memory settings
- NOTE: You can reduce the Minimum RAM, increase the Maximum RAM, or change the Memory Buffer value or the Memory Weight value at any time, but to enable or disable Dynamic Memory, you must shut down the VM.
- NOTE: USING WINDOWS POWERSHELL
- To configure the memory settings for a VM, use the Set-VMMemory cmdlet by using the following basic syntax:
- Set-VMMemory <VM name> -DynamicMemoryEnabled $true -MinimumBytes <memory> -StartupBytes <memory> -MaximumBytes <memory> -Priority <value> -Buffer <percentage>
- To configure the memory settings for a VM, use the Set-VMMemory cmdlet by using the following basic syntax:
- use a feature called Dynamic Memory to automatically reallocate memory to the VM from a shared memory pool as its demands change. If a virtualized server starts to experience larger amounts of client traffic, for example, Hyper-V can increase the memory allocated to the system, and reduce it again when the traffic subsides.
- Dynamic memory enables Hyper-V to adjust the amount of RAM allocated to VMs, depending on their ongoing requirements.
- SMART PAGING
- Hyper-V includes a feature called smart paging. If a VM has to restart and there is not enough memory available to allocate its startup RAM value, the system uses hard disk space to make up the difference and begins paging memory contents to disk.
- Hyper-V only uses smart paging in specific conditions:
- when a VM must be restarted, there is no free memory available, and there are no other means available to free up the necessary memory.
- Resource Metering
- Resource metering is a Windows PowerShell–based feature in Windows Server 2012 R2 Hyper-V that enables administrators to document VM usage by using a variety of criteria
- Resource metering uses Windows PowerShell cmdlets to track a variety of performance metrics for individual VMs, including the following:
- CPU utilization
- Minimum, maximum, and average memory utilization
- Disk space utilization
- Incoming and outgoing network traffic
- Resource metering uses Windows PowerShell cmdlets to track a variety of performance metrics for individual VMs, including the following:
- To use resource metering, you must first enable it for the specific VM that you want to monitor by using the Enable-VMResourceMetering cmdlet with the following syntax:
- Enable-VMResourceMetering –VMName <name>
- Once you have enabled metering, you can display a statistical report at any time by using the Measure-VM cmdlet with the following syntax:
- Measure-VM –VMName <name>
- administrators can also create resource pools that enable them to monitor specific VM components, such as processors, memory, network adapters, and VHDs. You create a resource pool by using the New-VMResourcePool cmdlet and then enable metering for the pool by using Enable-VMResourceMetering
- Resource metering is a Windows PowerShell–based feature in Windows Server 2012 R2 Hyper-V that enables administrators to document VM usage by using a variety of criteria
- Guest Integration Services
Chapter 3.2
- Create and configure virtual machine storage
- Virtual disk formats
- Windows Server 2012 R2 Hyper-V supports the original VHD disk image file and the new VHDX format.
- There are three types of VHD files, as follows:
- Fixed hard disk image
- An image file of a specified size in which all the disk space required to create the image is allocated during its creation. Fixed disk images can be wasteful in terms of storage because they can contain large amounts of empty space, but they are also efficient from a performance standpoint because there is no overhead due to dynamic expansion.
- Dynamic hard disk image
- An image file with a specified maximum size, which starts small and expands as needed to accommodate the data the system writes to it. This option conserves disk space but can negatively affect performance
- Differencing hard disk image
- A child image file associated with a specific parent image. The system writes all changes made to the data on the parent image file to the child image, to manage disk space or to facilitate a rollback at a later time.
- Fixed hard disk image
- VHD images are limited to maximum size of 2 TB and are compatible with all versions of Hyper-V and Microsoft Type II hypervisor products.
- VHDX image files can be as large as 64 TB, and they also support 4-KB logical sector sizes to provide compatibility with new 4-KB native drives. VHDX files can also use larger block sizes (up to 256 MB)
- VHDX files are not backward compatible and can only be read by Windows Server 2012, Windows Server 2012 R2, Windows 8, and Windows 8.1 Hyper-V servers. If migrating your VMs from Windows Server 2012 R2 to an older version of Hyper-V is even a remote possibility, you should continue using the VHD file format.
- VHDX image files can be as large as 64 TB, and they also support 4-KB logical sector sizes to provide compatibility with new 4-KB native drives. VHDX files can also use larger block sizes (up to 256 MB)
- There are three types of VHD files, as follows:
- Windows Server 2012 R2 Hyper-V supports the original VHD disk image file and the new VHDX format.
- Virtual disk formats
- Creating virtual disks
- Creating a virtual disk with a VM
- The options for this disk are relatively limited and consist of the following:
- Create A Virtual Hard Disk
- Enables you to specify the name, location, and size of a new VHD. The wizard only allows you to create a dynamically expanding disk using the VHDX format, but you can also create fixed and differencing VHDX disks using Windows PowerShell.
- Use An Existing Virtual Hard Disk
- Enables you to specify the location of an existing VHD or VHDX disk, which the VM will presumably use as its system disk.
- Attach A Virtual Hard Disk Later
- Prevents the wizard from adding any virtual disks to the VM configuration. The assumption is that you will manually add a disk later, before you start the VM.
- Create A Virtual Hard Disk
- USING WINDOWS POWERSHELL
- To create a new disk image, use the New-VHD cmdlet with the following basic syntax
- New-VHD –Path c:\filename.vhd|c:\filename.vhdx –Fixed|-Dynamic|-Differencing –SizeBytes <size> [-BlockSizeBytes <block size>] [-LogicalSectorSizeBytes 512|4096] [-ParentPath <pathname>]
- When using the cmdlet to create a disk image, the extension you specify for the filename determines the format (VHD or VHDX); also, you can specify the block size and the logical sector size for the image, two things you cannot do in the GUI.
- New-VHD –Path c:\filename.vhd|c:\filename.vhdx –Fixed|-Dynamic|-Differencing –SizeBytes <size> [-BlockSizeBytes <block size>] [-LogicalSectorSizeBytes 512|4096] [-ParentPath <pathname>]
- To create a new disk image, use the New-VHD cmdlet with the following basic syntax
- The options for this disk are relatively limited and consist of the following:
- Creating differencing disks
- A Differencing disk enables you to preserve an existing virtual disk image file in its original state while mounting it in an operating system and even modifying its contents
- You can create multiple differencing disks that point to the same parent image, enabling you to populate a lab network with as many VMs as you need, which saves disk space and eliminates the need to repeatedly install the OS.
- To create a cloned version of a baseline installation with a differencing disk, use the following procedure.
- 1. Install and configure the baseline VM
- Create a new VM with a new disk image file and install a guest OS on it. Configure the OS as needed and install any roles, features, applications, or services you need.
- 2. Generalize the parent image
- Open an elevated command prompt on the baseline system and run the Sysprep.exe utility with the appropriate parameters for your requirements. Sysprep configures the system to assign itself a new, unique security ID (SID) the next time the computer starts. This enables you to create multiple cloned systems from a single disk image.
- 3. Create a parent disk image
- Once you have generalized the baseline installation, you no longer need the original VM. You can delete everything except the VHD or VHDX file containing the disk image. This will become your parent image. Open the Properties sheet for the image file and set the read-only flag to ensure that the baseline does not change.
- 4. Create a differencing disk
- By using the New Virtual Hard Disk Wizard or the New- VHD cmdlet for Windows PowerShell, create a new differencing disk pointing to the baseline image you created and prepared earlier as the parent image.
- 5. Create a cloned VM
- Create a new VM and, on the Connect Virtual Hard Disk page, attach the differencing disk you just created to it by using the Use An Existing Virtual Hard Disk option.
- 1. Install and configure the baseline VM
- To create a cloned version of a baseline installation with a differencing disk, use the following procedure.
- You can create multiple differencing disks that point to the same parent image, enabling you to populate a lab network with as many VMs as you need, which saves disk space and eliminates the need to repeatedly install the OS.
- A Differencing disk enables you to preserve an existing virtual disk image file in its original state while mounting it in an operating system and even modifying its contents
- Configuring pass-through disks
- A pass-through disk is a type of virtual disk that points to a physical disk drive installed on the host computer. When you add a hard drive to any of the controllers in a VM, you have the option of selecting a physical hard disk as opposed to a virtual one.
- To add a physical hard disk to a VM, the VM must have exclusive access to it. This means that you must first take the disk offline in the parent OS by using the Disk Management snap-in, as shown in Figure 3-19, or the Diskpart.exe utility. Once the disk is offline, it will be available for selection in the Physical Hard Disk drop-down list.
- A pass-through disk is a type of virtual disk that points to a physical disk drive installed on the host computer. When you add a hard drive to any of the controllers in a VM, you have the option of selecting a physical hard disk as opposed to a virtual one.
- Modifying virtual disks
- Windows Server 2012 R2 and Hyper-V provide several ways for administrators to manage and manipulate VHD images without mounting them in a VM. Once you have created a VHD, whether you have attached it to a VM or not, you can manage it by using the Edit Virtual Hard Disk Wizard in Hyper-V Manager.
- Select one of the following functions:
- Compact
- Reduces the size of a dynamically expanding or differencing disk by deleting empty space while leaving the disk’s capacity unchanged
- Convert
- Changes the type of format of a disk by copying the data to a new disk image file
- Expand
- Increases the capacity of the disk by adding empty storage space to the image file
- Shrink
- Reduces the capacity of the disk by deleting empty storage space from the file
- Merge
- Combines the data on a differencing disk with that of the parent disk to form a single composite image file
- Compact
- Select one of the following functions:
- Windows Server 2012 R2 and Hyper-V provide several ways for administrators to manage and manipulate VHD images without mounting them in a VM. Once you have created a VHD, whether you have attached it to a VM or not, you can manage it by using the Edit Virtual Hard Disk Wizard in Hyper-V Manager.
- Creating a virtual disk with a VM
- Creating checkpoints
- In Hyper-V, a checkpoint is a captured image of the state, data, and hardware configuration of a VM at a particular moment in time. Creating checkpoints is a convenient way for administrators to revert a VM to a previous state at will.
- Administrators also should not use checkpoints on VMs containing databases—such as those created by SQL Server, Exchange, or Windows domain controllers—because the checkpointing process does not account for the current state of the database, and corruption might occur
- In Hyper-V, a checkpoint is a captured image of the state, data, and hardware configuration of a VM at a particular moment in time. Creating checkpoints is a convenient way for administrators to revert a VM to a previous state at will.
- Configuring Storage Quality of Service (QoS)
- Because it is common for there to be more than one virtual hard disk hosted by a single physical hard disk, it is possible for one virtual disk to monopolize the input/output capacity of a physical disk, causing the other virtual disks to slow down. To help prevent this, Windows Server 2012 R2 enables you to control the Quality of Service (QoS) for a given virtual hard disk.
- QoS management in Hyper-V takes the form of controls that enables you to specify the minimum and maximum input/output operations per second (IOPS) for a disk.
- After selecting the Enable Quality of Service Management check box, you can specify Minimum IOPS values and Maximum IOPS values for the disk in 8 KB increments.
- QoS management in Hyper-V takes the form of controls that enables you to specify the minimum and maximum input/output operations per second (IOPS) for a disk.
- Because it is common for there to be more than one virtual hard disk hosted by a single physical hard disk, it is possible for one virtual disk to monopolize the input/output capacity of a physical disk, causing the other virtual disks to slow down. To help prevent this, Windows Server 2012 R2 enables you to control the Quality of Service (QoS) for a given virtual hard disk.
- Connecting to a storage area network (SAN)
- At its most basic level, a storage area network (SAN) is simply a network dedicated to highspeed connections between servers and storage devices. Instead of installing disk drives into servers or connecting them by using an external SCSI bus, a SAN consists of one or more drive arrays equipped with network interface adapters, which you connect to your servers by using standard twisted pair or fiber optic network cables. A SAN-connected server, therefore, typically has at least two network adapters, one for the standard local area network (LAN) connection and one for the SAN,
- Any device on a SAN can conceivably communicate with any other device on the same SAN, high-speed data transfers can occur in any of the following ways:
- Server to storage
- Servers can access storage devices over the SAN just as if they were connected directly to the computer.
- Server to server
- Servers can use the SAN to communicate directly with one another at high speeds to avoid flooding the LAN with traffic.
- FLOODING
- In a network, flooding is the forwarding by a router of a packet from any node to every other node attached to the router except the node from which the packet arrived. Flooding is a way to distribute routing information updates quickly to every node in a large network.
- FLOODING
- Servers can use the SAN to communicate directly with one another at high speeds to avoid flooding the LAN with traffic.
- Storage to storage
- Storage devices can communicate among themselves without server intervention, for example, to perform backups from one medium to another or to mirror drives on different arrays.
- Although a SAN is not in itself a high-availability technology, you can make it one by connecting redundant servers to the same network, enabling them to access the same data storage devices. If one server should fail, another can assume its roles by accessing the same data. This is called server clustering.
- Servers and storage devices cannot exchange SCSI commands over a SAN connection the way they do when the devices are directly connected using a SCSI cable. To communicate over a SAN, servers and storage devices map their SCSI communications onto another protocol, such as Fibre Channel.
- Using Fibre Channel
- Fibre Channel is a versatile SAN communications technology supporting various network media, transmission speeds, topologies, and upper-level protocols. Its primary disadvantage is that it requires specialized hardware that can be extremely expensive.
- there is also a variant called Fibre Channel over Ethernet (FCoE) that uses standard Ethernet hardware and is therefore much less expensive.
- Fibre Channel is a versatile SAN communications technology supporting various network media, transmission speeds, topologies, and upper-level protocols. Its primary disadvantage is that it requires specialized hardware that can be extremely expensive.
- Using Fibre Channel
- Servers and storage devices cannot exchange SCSI commands over a SAN connection the way they do when the devices are directly connected using a SCSI cable. To communicate over a SAN, servers and storage devices map their SCSI communications onto another protocol, such as Fibre Channel.
- Server to storage
- Any device on a SAN can conceivably communicate with any other device on the same SAN, high-speed data transfers can occur in any of the following ways:
- Connecting virtual machines to a SAN
- A Hyper-V Fibre Channel adapter is essentially a pass-through device that enables a VM to access a physical Fibre Channel adapter installed in the computer, and through that, to access the external resources connected to the SAN. With this capability, applications running on VMs can access data files stored on SAN devices and administrators can use VMs to create server clusters with shared storage subsystems.
- Assuming you have the appropriate hardware and software installed on the host computer, you implement the Fibre Channel capabilities in Hyper-V by first creating a virtual SAN by using the Virtual SAN Manager, accessible from Hyper-V Manager. When you create the virtual SAN, the World Wide Node Names (WWNNs) and World Wide Port Names (WWPNs) of your host bus adapter appear,
- The next step is to add a Fibre Channel adapter to a VM from the Add Hardware page in the Settings dialog box. When you do this, the virtual SAN you created earlier is available on the Fibre Channel Adapter page. Hyper-V virtualizes the SAN and makes the WWNNs and WWPNs available to the VM.
- Assuming you have the appropriate hardware and software installed on the host computer, you implement the Fibre Channel capabilities in Hyper-V by first creating a virtual SAN by using the Virtual SAN Manager, accessible from Hyper-V Manager. When you create the virtual SAN, the World Wide Node Names (WWNNs) and World Wide Port Names (WWPNs) of your host bus adapter appear,
- A Hyper-V Fibre Channel adapter is essentially a pass-through device that enables a VM to access a physical Fibre Channel adapter installed in the computer, and through that, to access the external resources connected to the SAN. With this capability, applications running on VMs can access data files stored on SAN devices and administrators can use VMs to create server clusters with shared storage subsystems.
- At its most basic level, a storage area network (SAN) is simply a network dedicated to highspeed connections between servers and storage devices. Instead of installing disk drives into servers or connecting them by using an external SCSI bus, a SAN consists of one or more drive arrays equipped with network interface adapters, which you connect to your servers by using standard twisted pair or fiber optic network cables. A SAN-connected server, therefore, typically has at least two network adapters, one for the standard local area network (LAN) connection and one for the SAN,
- Create and configure virtual machine storage
Chapter 3.3 - Create and configure virtual networks
- Creating virtual switches
- A virtual switch, like its physical counterpart, is a device that functions at Layer 2 of the Open Systems Interconnect (OSI) reference model
- Unlike physical switches, the virtual switches created by Hyper-V can have an unlimited number of ports, so administrators don’t have to be concerned about connecting switches together or about uplinks and crossover circuits.
- Creating the default virtual switch
- When you install Hyper-V on a server running Windows Server 2012 R2, the Create Virtual Switches page provides you with the opportunity to create a virtual switch for each of the physical network adapters installed in the host computer. These switches enable VMs to participate on the networks to which the physical adapters are connected.
- When you create a virtual switch, the networking configuration in the host OS on the parent partition changes. The new virtual switch appears in the Network Connections window, and if you examine its properties, you can see that the switch is bound to the operating system’s TCP/IP client,
- Meanwhile, Hyper-V also changes the properties of original network connection representing the physical network interface adapter in the computer. The physical network adapter is now bound only to the virtual switch,
- As a result, the computer’s physical network configuration, in which its network adapter is connected to an external physical switch, is overlaid by the virtual network configuration created by Hyper-V. In this virtual configuration, the virtual switch is connected to the physical switch and the network adapter in the host OS is connected to the virtual switch.
- Meanwhile, Hyper-V also changes the properties of original network connection representing the physical network interface adapter in the computer. The physical network adapter is now bound only to the virtual switch,
- When you create a virtual switch, the networking configuration in the host OS on the parent partition changes. The new virtual switch appears in the Network Connections window, and if you examine its properties, you can see that the switch is bound to the operating system’s TCP/IP client,
- When you install Hyper-V on a server running Windows Server 2012 R2, the Create Virtual Switches page provides you with the opportunity to create a virtual switch for each of the physical network adapters installed in the host computer. These switches enable VMs to participate on the networks to which the physical adapters are connected.
- Creating a new virtual switch
- Hyper-V in Windows Server 2012 R2 supports three types of switches, which you must create in the Virtual Switch Manager before you can connect VMs to them.
- External
- The virtual switch is bound to the networking protocol stack in the host OS and connected to a physical network interface adapter in the Hyper-V server. VMs running on the server’s parent and child partitions can all access the physical network to which the physical adapter is connected.
- Internal
- An internal network switch is bound to a separate instance of the networking protocol stack in the host OS, independent from the physical network interface adapter and its connected network. VMs running on the server’s parent and child partitions can all access the virtual network implemented by the virtual switch; the host OS on the parent partition can access the physical network through the physical network interface adapter, but the VMs on the child partitions cannot access the physical network through the physical adapter.
- Private
- A private network switch exists only in the Hyper-V server and is accessible only to the VMs running on the child partitions. The host OS on the parent partition can access the physical network through the physical network interface adapter, but it cannot access the virtual network created by the virtual switch.
- External
- Click Create Virtual Switch to open the Virtual Switch Properties. Configure the following options, if desired:
- Allow Management Operating System To Share This Network Adapter
- Selected by default when you create an external virtual switch, clearing this check box excludes the host OS from the physical network while allowing access to the child VMs.
- Enable Single Root I/O Virtualization (SR-IOV)
- Enables you to create an external virtual switch that is associated with a physical network adapter capable of supporting SR-IOV. This option is only available when creating a new virtual switch; you cannot modify an existing virtual switch to use this option.
- Enable Virtual LAN Identification For Management Operating System
- If your host computer is connected to a physical switching infrastructure that uses virtual LANs (VLANs) to create separate subnets, you can select this check box and enter a VLAN identifier to associate the virtual switch with a particular VLAN on your physical network.
- Allow Management Operating System To Share This Network Adapter
- You can create additional virtual switches as needed. You can create only one external switch for each physical network adapter in the computer, but you can create multiple internal or private switches to create as many virtual networks as you need.
- To create a new virtual switch by using Windows PowerShell, use the New-VMSwitch cmdlet with the following basic syntax: New-VMSwitch <switch name> -NetAdapterName <adapter name> [-SwitchType Internal|Private]
- Hyper-V in Windows Server 2012 R2 supports three types of switches, which you must create in the Virtual Switch Manager before you can connect VMs to them.
- A virtual switch, like its physical counterpart, is a device that functions at Layer 2 of the Open Systems Interconnect (OSI) reference model
- Configuring MAC addresses
- Every network interface adapter has a Media Access Control (MAC) address—sometimes called a hardware address—that uniquely identifies the device on the network. On physical network adapters, the MAC is assigned by the manufacturer and permanently entered in the adapter’s firmware. The MAC address is a 6-byte hexadecimal value, the first three bytes of which are an organizationally unique identifier (OUI) that specifies the manufacturer, and the last three bytes of which identify the adapter itself.
- The MAC address is essential to the operation of a LAN, so the virtual network adapters on a Hyper-V server need to have them. The server has at least one real MAC address, provided in its physical network adapter, but Hyper-V cannot use that one address for all the virtual adapters connecting VMs to the network.
- Instead, Hyper-V creates a pool of MAC addresses during the installation of the role and it assigns addresses from this pool to VMs as you create them.
- The first three bytes of the MAC address range are always 00-15-5D, which is an OUI registered by Microsoft. The fourth and fifth bytes of the MAC address are the last two bytes of the IP address assigned to the server’s physical network adapter, converted to hexadecimal notation. The sixth and last byte of the MAC address contains the range of values from 00 to FF, which provides 256 possible addresses.
- The Hyper-V server assigns the MAC addresses to the network adapters in VMs as administrators create the adapters. The adapters retain their MAC addresses permanently or until the adapter is removed from the VM. The server reclaims any unused addresses and reuses them.
- The default pool of 256 addresses is expected to be sufficient for most Hyper-V VM configurations, but if it is not, you can modify the Minimum and Maximum values to enlarge the pool. To prevent address duplication, you should change the second-to-last byte only, making it into a range of addresses like the last byte. For example, the range illustrated in the figure provides 256 addresses with the following values: 00-15-1D-02-12-00 to 00-15-1D-02-12-FF Modifying only the least significant digit, as in the following values, increases the pool from 256 to 4,096: 00-15-1D-02-10-00 to 00-15-1D-02-1F-FF
- When you modify the MAC address pool and you have other Hyper-V servers on your network, you must be careful not to create an overlap situation in which duplicate MAC addresses can occur or networking problems can result.
- The default pool of 256 addresses is expected to be sufficient for most Hyper-V VM configurations, but if it is not, you can modify the Minimum and Maximum values to enlarge the pool. To prevent address duplication, you should change the second-to-last byte only, making it into a range of addresses like the last byte. For example, the range illustrated in the figure provides 256 addresses with the following values: 00-15-1D-02-12-00 to 00-15-1D-02-12-FF Modifying only the least significant digit, as in the following values, increases the pool from 256 to 4,096: 00-15-1D-02-10-00 to 00-15-1D-02-1F-FF
- The Hyper-V server assigns the MAC addresses to the network adapters in VMs as administrators create the adapters. The adapters retain their MAC addresses permanently or until the adapter is removed from the VM. The server reclaims any unused addresses and reuses them.
- The first three bytes of the MAC address range are always 00-15-5D, which is an OUI registered by Microsoft. The fourth and fifth bytes of the MAC address are the last two bytes of the IP address assigned to the server’s physical network adapter, converted to hexadecimal notation. The sixth and last byte of the MAC address contains the range of values from 00 to FF, which provides 256 possible addresses.
- Instead, Hyper-V creates a pool of MAC addresses during the installation of the role and it assigns addresses from this pool to VMs as you create them.
- The MAC address is essential to the operation of a LAN, so the virtual network adapters on a Hyper-V server need to have them. The server has at least one real MAC address, provided in its physical network adapter, but Hyper-V cannot use that one address for all the virtual adapters connecting VMs to the network.
- Every network interface adapter has a Media Access Control (MAC) address—sometimes called a hardware address—that uniquely identifies the device on the network. On physical network adapters, the MAC is assigned by the manufacturer and permanently entered in the adapter’s firmware. The MAC address is a 6-byte hexadecimal value, the first three bytes of which are an organizationally unique identifier (OUI) that specifies the manufacturer, and the last three bytes of which identify the adapter itself.
- Creating virtual network adapters
- Once you have created virtual switches in Hyper-V Manager, you can connect VMs to them by creating and configuring virtual network adapters. When you create a new VM, the default configuration includes one virtual network adapter. The New Virtual Machine Wizard includes a Configure Networking page, on which you can select one of the virtual switches you have created.
- You can create up to 12 network adapters on a Windows Server 2012 R2 Hyper-V server: eight synthetic and four emulated.
- Synthetic adapters and emulated adapters
- A synthetic adapter is a purely virtual device that does not correspond to a real-world product. Synthetic devices in a VM running on a child partition communicate with the parent partition by using a high-speed conduit called the VMBus.
- The virtual switches you create in Hyper-V reside in the parent partition and are part of a component called the network Virtualization Service Provider (VSP). The synthetic network adapter in the child partition is a Virtualization Service Client (VSC). The VSP and the VSC are both connected to the VMBus, which provides interpartition communications. The VSP, in the parent partition, provides the VSC, in the child partition, with access to the physical hardware in the host computer; that is, the physical network interface adapter.
- Because they have access to the hardware through the VMBus, synthetic adapters provide a much higher level of performance than the alternative, emulated adapters. Synthetic adapters are implemented as part of the Guest Integration Services package that runs on supported guest OSs. The main drawback of synthetic network adapters is that they are not operational until the OS is loaded on the VM.
- The virtual switches you create in Hyper-V reside in the parent partition and are part of a component called the network Virtualization Service Provider (VSP). The synthetic network adapter in the child partition is a Virtualization Service Client (VSC). The VSP and the VSC are both connected to the VMBus, which provides interpartition communications. The VSP, in the parent partition, provides the VSC, in the child partition, with access to the physical hardware in the host computer; that is, the physical network interface adapter.
- An emulated adapter—sometimes called a legacy adapter—is a standard network adapter driver that communicates with the parent partition by making calls directly to the hypervisor, which is external to the partitions,
- This communication method is substantially slower than the VMBus used by the synthetic network adapters and is therefore less desirable.
- To install an emulated adapter, you use the same procedure described earlier, except that you select Legacy Network Adapter from the Add Hardware list. Unlike synthetic adapters, emulated adapters load their drivers before the OS, so it is possible to boot the VM by using the Preboot eXecution Environment (PXE) and then deploy an OS over the network.
- This communication method is substantially slower than the VMBus used by the synthetic network adapters and is therefore less desirable.
- A synthetic adapter is a purely virtual device that does not correspond to a real-world product. Synthetic devices in a VM running on a child partition communicate with the parent partition by using a high-speed conduit called the VMBus.
- Synthetic adapters and emulated adapters
- You can create up to 12 network adapters on a Windows Server 2012 R2 Hyper-V server: eight synthetic and four emulated.
- Configuring advanced network adapter features
- The Advanced Features page provides additional options for supporting network adapter capabilities, as follows:
- Static MAC Address
- By default, virtual network adapters receive a dynamically assigned MAC address from the Hyper-V server. However, you can opt to create a static MAC address by using this option. The only requirement is that no other adapter, virtual or physical, on the same network uses the same address.
- Enable MAC Address Spoofing
- When enabled, the port in the virtual switch to which the virtual network adapter is connected can send and receive packets that contain any MAC address. The virtual switch port can also learn of new MAC addresses and add them to its forwarding table.
- Enable DHCP Guard
- Prevents the adapter from processing messages sent by rogue DHCP servers.
- Port Mirroring Mode
- Enables the adapter to forward all the packets it receives over the network to another virtual adapter for analysis by using an application such as Network Monitor.
- NIC Teaming
- Enables the adapter to add its bandwidth to that of other adapters in the same guest OS in a NIC teaming arrangement.
- Static MAC Address
- The Advanced Features page provides additional options for supporting network adapter capabilities, as follows:
- Once you have created virtual switches in Hyper-V Manager, you can connect VMs to them by creating and configuring virtual network adapters. When you create a new VM, the default configuration includes one virtual network adapter. The New Virtual Machine Wizard includes a Configure Networking page, on which you can select one of the virtual switches you have created.
- Configuring hardware acceleration settings
- When you expand a network adapter in the Settings dialog box of a VM, you gain access to the Hardware Acceleration page. On this page, you can configure the following hardware acceleration settings:
- Enable Virtual Machine Queue
- Virtual machine queue (VMQ) is a technique that stores incoming packets intended for VMs in separate queues on the physical network adapter and delivers them directly to the VMs, bypassing the processing normally performed by the virtual switch on the parent partition.
- Enable IPsec Task Offloading
- Uses the components on the network adapter to perform some of the cryptographic functions required by IPsec. You can also specify the maximum number of security associations you want the adapter to be able to calculate.
- Single-Root I/O Virtualization
- Enables the virtual adapter to take advantage of the SR-IOV capabilities of the physical adapter.
- Enable Virtual Machine Queue
- When you expand a network adapter in the Settings dialog box of a VM, you gain access to the Hardware Acceleration page. On this page, you can configure the following hardware acceleration settings:
- Configuring NIC teaming in a virtual network environment
- NIC teaming is a Windows feature that enables administrators to join multiple network adapters into a single entity for performance enhancement or fault tolerance purposes. Hyper-V virtual machines can also take advantage of NIC teaming, but they are limited to teams of only two, as opposed to the host operating system, which can have teams of up to 64 NICs.
- To use NIC teaming in Hyper-V, you must complete three basic tasks, as follows:
- 1. Create the NIC team in the Windows Server 2012 R2 host operating system.
- 2. In Hyper-V Manager, create an external virtual switch using the NIC team.
- 3. Configure the network adapter in a virtual machine to connect to the virtual switch representing the NIC team.
- To use NIC teaming in Hyper-V, you must complete three basic tasks, as follows:
- Creating the NIC team
- NIC teams must consist of physical network interface adapters, so before you can use a NIC team in a virtual machine, you must create it in the host operating system. After installing two NICs in the computer, you can create a NIC team with Server Manager in the usual manner. Creating the team installs the Microsoft Network Adapter Multiplexor Driver, which appears as one of the components of the network connection representing the team.
- Creating the team virtual switch
- Once you have created the NIC team, you can open the Virtual Switch Manager and create a new virtual switch by selecting the External network option and choosing Microsoft Network Adapter Multiplexor Driver from the drop-down list
- Configuring a NIC team virtual network adapter
- To configure a virtual machine to use a NIC team, you must use the Settings dialog box to modify the properties for a virtual network adapter, configuring it to use the team switch you created in the previous section,
- Finally, you must open the Advanced Features page for the network adapter and select the Enable The Network Adapter To Be Part Of A Team In The Guest Operating System check box. At this point, the NIC team is operational for the virtual machine. You can unplug one of the network cables and the system will maintain its connection to the network.
- To configure a virtual machine to use a NIC team, you must use the Settings dialog box to modify the properties for a virtual network adapter, configuring it to use the team switch you created in the previous section,
- NIC teaming is a Windows feature that enables administrators to join multiple network adapters into a single entity for performance enhancement or fault tolerance purposes. Hyper-V virtual machines can also take advantage of NIC teaming, but they are limited to teams of only two, as opposed to the host operating system, which can have teams of up to 64 NICs.
- Creating virtual network configurations
- Hyper-V makes it possible to extend nearly any existing physical network configuration into its virtual space or create a completely separated and isolated network within the Hyper-V environment.
- The basic default configuration of a Hyper-V VM connects its network adapter to an external virtual switch, thus attaching the guest OS on the VM to the outside network. The VM can then take advantage of services running on the outside network and send traffic through routers to other networks, including the Internet.
- This type of arrangement can enable administrators to consolidate many physical servers into VMs on a single Hyper-V server, providing them all with access to the entire network.
- The basic default configuration of a Hyper-V VM connects its network adapter to an external virtual switch, thus attaching the guest OS on the VM to the outside network. The VM can then take advantage of services running on the outside network and send traffic through routers to other networks, including the Internet.
- Extending a production network into virtual space
- Keep in mind that a Hyper-V server can have multiple physical network adapters installed in it, which might be connected to different networks to separate traffic or they might be connected to the same network to increase available bandwidth. You might also have adapters dedicated to SAN connections for shared storage and server clustering. Microsoft recommends the use of at least two physical network adapters in a Hyper-V server, with one adapter servicing the parent partition and the other connected to the child partitions. When you have more than two physical adapters in the server, you can create separate external virtual network switches for the physical adapters and connect each one to a separate VM.
- Creating an isolated network
- For testing and evaluation purposes or for classroom situations, administrators might want to create isolated network environments. By creating internal or private virtual switches, you can create a network that exists only within the Hyper-V space, with or without the parent partition included.
- An isolated network such as this has limitations, however. If you want to install the guest OSs by using Windows Deployment Services or configure the VMs by using DHCP, you must install and configure those services on your private network. The guest OSs also do not have access to the Internet, which prevents them from downloading OS updates. In this case, you must deploy appropriate substitutes on the private network.
- One way to provide your systems with updates is to install two network adapters on each of your VMs, connecting one to a private switch and one to an external switch. This enables the VMs to access the Internet and the private network.
- Another method for creating an isolated network is to use VLANs. This is particularly helpful if you have VMs on different Hyper-V servers that you want to add to the isolated network. By connecting the network adapters to an external switch and configuring them with the same VLAN identifier, you can create a network within a network, which isolates the VLAN from other computers. You can, for example, deploy a DHCP server on your VLAN without it interfering with the other DHCP servers in your production environment.
- One way to provide your systems with updates is to install two network adapters on each of your VMs, connecting one to a private switch and one to an external switch. This enables the VMs to access the Internet and the private network.
- An isolated network such as this has limitations, however. If you want to install the guest OSs by using Windows Deployment Services or configure the VMs by using DHCP, you must install and configure those services on your private network. The guest OSs also do not have access to the Internet, which prevents them from downloading OS updates. In this case, you must deploy appropriate substitutes on the private network.
- For testing and evaluation purposes or for classroom situations, administrators might want to create isolated network environments. By creating internal or private virtual switches, you can create a network that exists only within the Hyper-V space, with or without the parent partition included.
- Hyper-V makes it possible to extend nearly any existing physical network configuration into its virtual space or create a completely separated and isolated network within the Hyper-V environment.
- Creating virtual switches
Imagens e arquivos do mapa

Informações
- Descrição
- Certificações Informática Mapa Mental sobre Windows Server 2012 R2 - Chapter 3, criado por naelson alves em 03-12-2017.
- Criado por
- naelson alves
- Visualizações
- 1
- Avaliação