
Mindmap
Adobe InDesign
Inhalt der Mindmap
Adobe InDesign
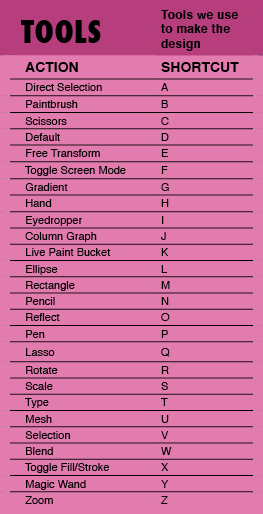
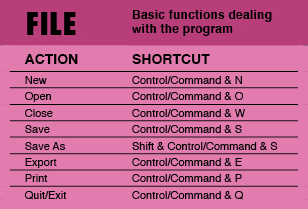
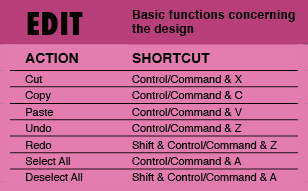
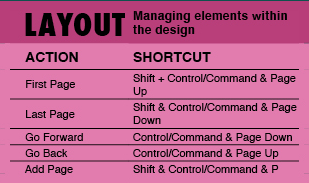
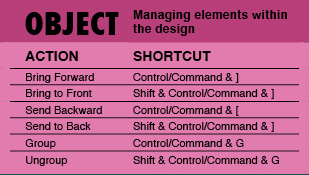
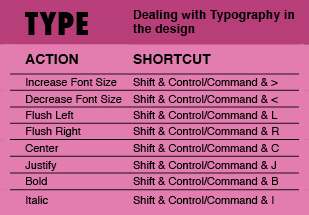
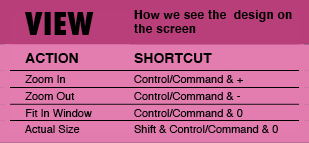
Shortcuts
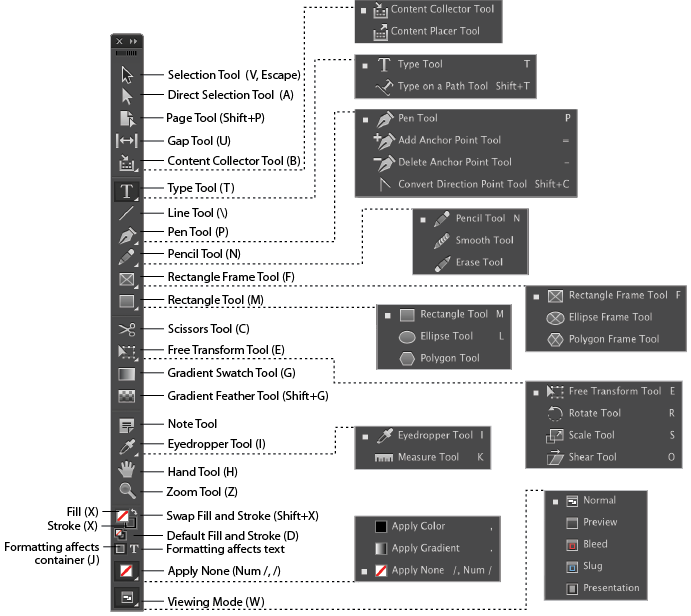
The Toolbar
Tips
- Placing Graphics
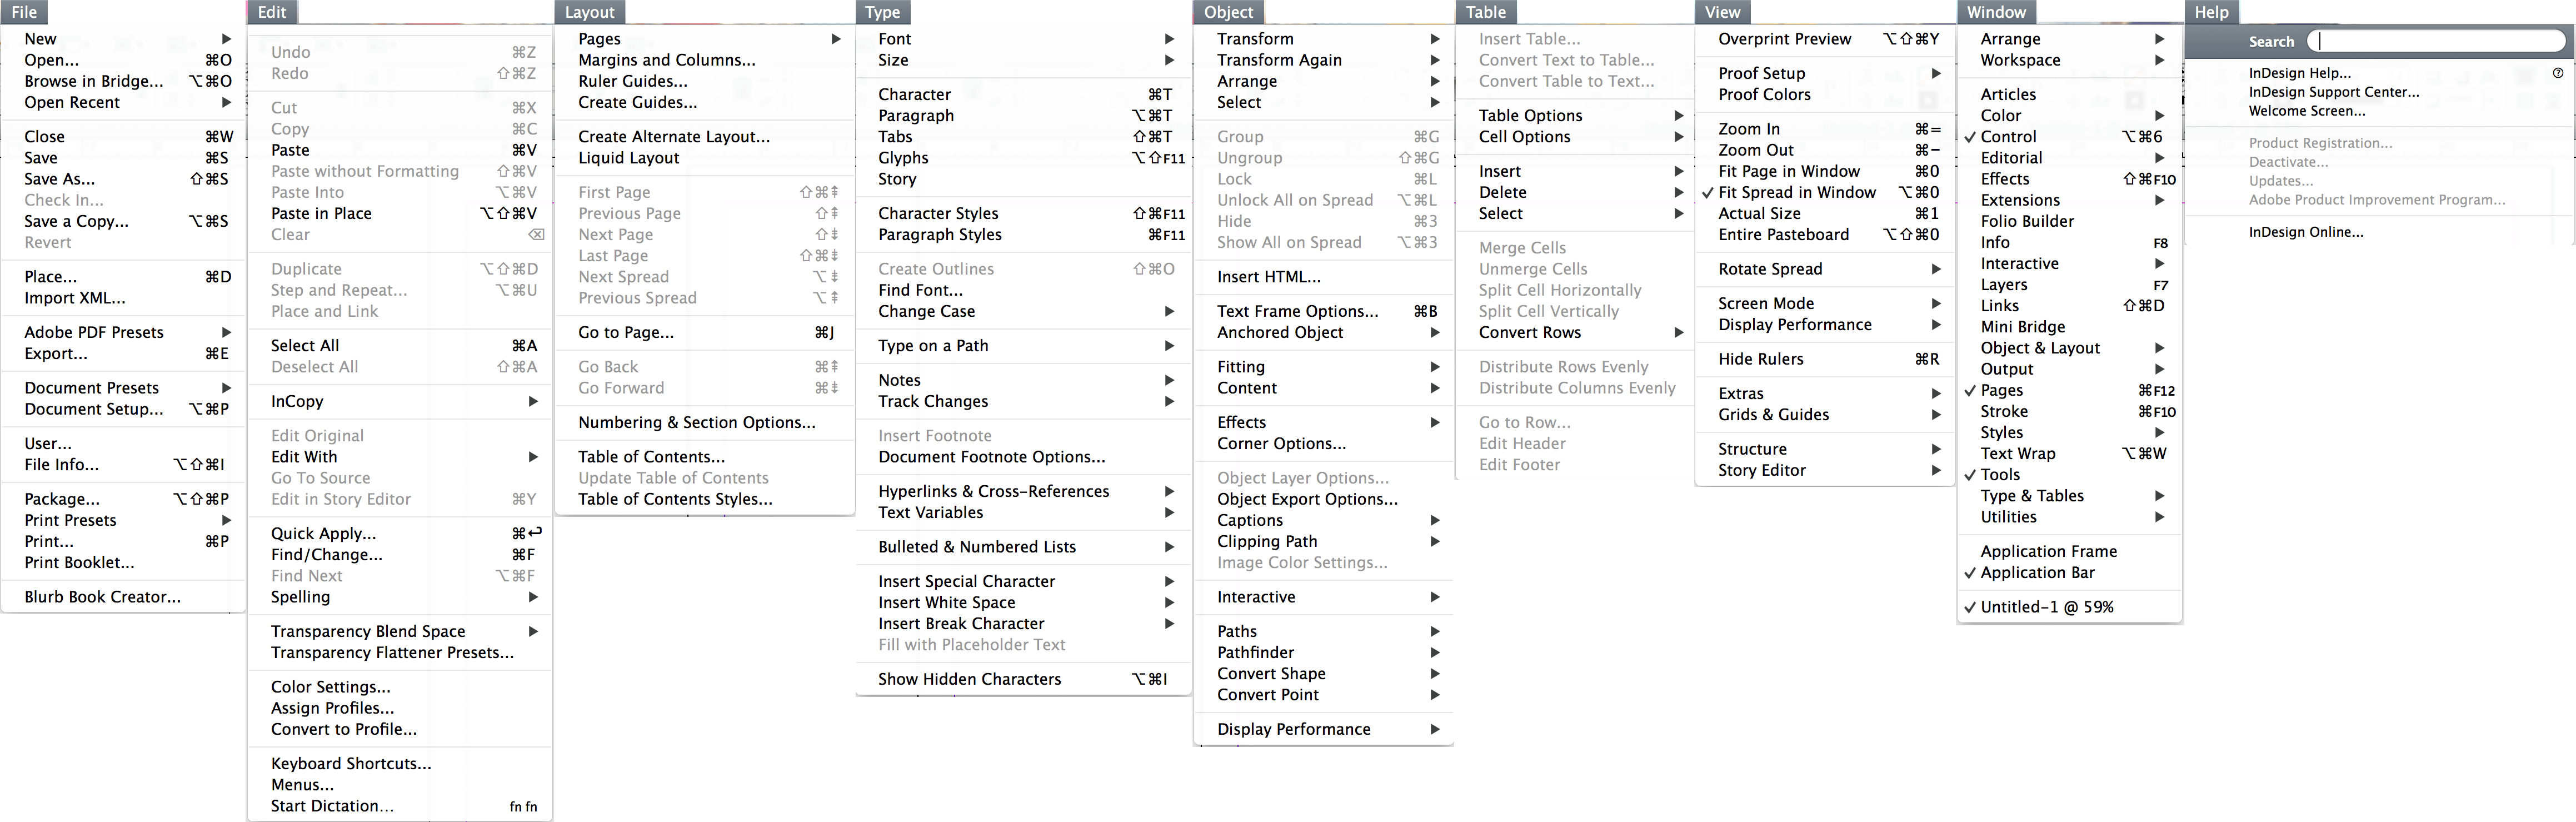
- When placing graphics, DO NOT copy and paste. Instead go to: "File > Place" and choose your images.
- Shortcut: Ctrl + D (PC) Cmd + D (Mac)
- Text Wrapping
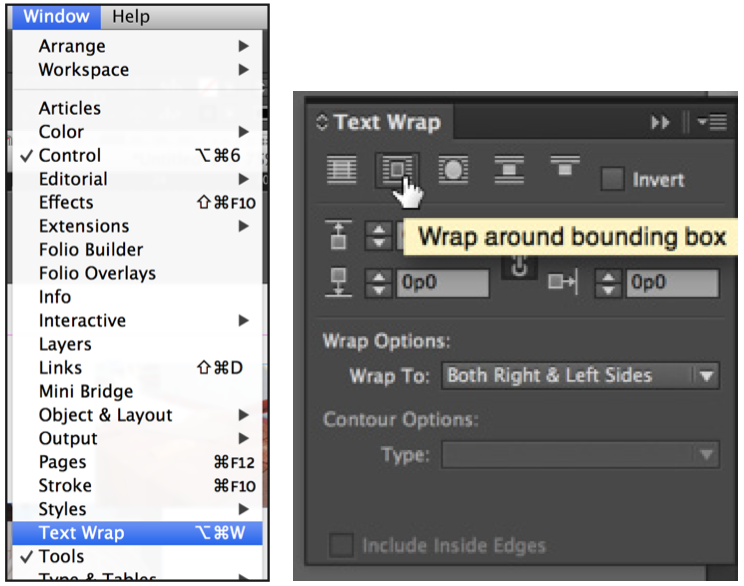
- To have text flow around an image, go to: "Window > Text Wrap" Select the image you want to wrap the text around. Select "Wrap around bounding box" in the text wrap panel. Click and drag to move the image into the body of text.
- Changing What Part of the Image is Showing
- The circle in the middle is called the "content grabber" - if selected, an orange border appears and the cursor will become a hand. You can expand or contract by pressing and holding the "shift" key on the keyboard and dragging content using the orange boxes/handles (shift keeps the content proportional). Click and hold to move the content around so that it looks correct in the frame. When done press "Escape" on the keyboard.
- Adjust the Size of Graphics
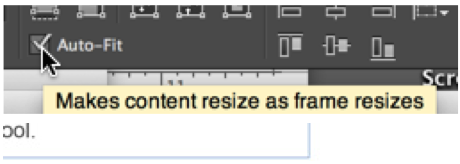
- Select the image's frame (blue outline). In the formatting bar, check the "Auto-Fit" box. Grab corner boxes/handles to resize the media centre image to take up more area on the page.
- Multi-Page Documents
- All pages in a multi-page document are listed under "pages" panel. Double click on page to jump to that page.
- Adding Pages
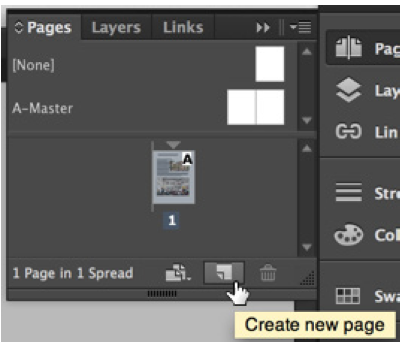
- Select the "Create new page" button at the bottom of the panel.
- Deleting Pages
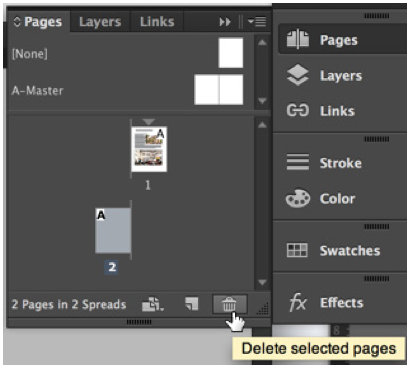
- Select the pages and then click the "Delete selected pages" in the bottom of the panel.
- Interactivity
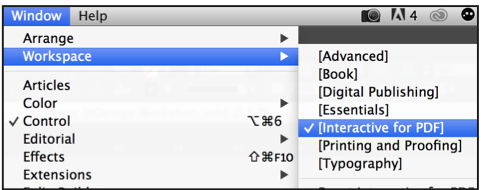
- Go to: "Window > Workspace" and select "Interactive for PDF" to change the workspace.
- Note: most interactive features don't show up in InDesign until you export to a PDF.
- Hyperlinks
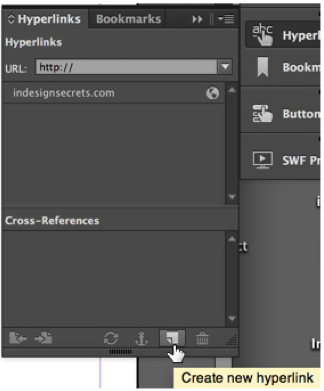
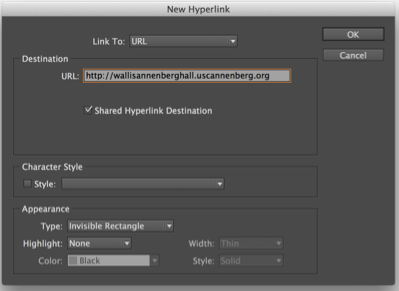
- Select the information you want to create a hyperlink for. Click on the "Hyperlinks" panel. From the bottom of the panel, select the little page icon "Create a new hyperlink" From the drop down menu select "URL" Insert the URL you wish to use. Click "OK"
- Select the information you want to create a hyperlink for. Click on the "Hyperlinks" panel. From the bottom of the panel, select the little page icon "Create a new hyperlink" From the drop down menu select "URL" Insert the URL you wish to use. Click "OK"
- Hyperlink Between Pages in a Document
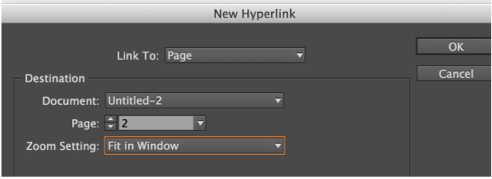
- Select the object you want to add a hyperlink too. Click on the "Hyperlinks" panel. From the bottom of the panel, select the page icon to create a new hyperlink. From the drop down menu select "Page" Select which page to jump to. Change the Zoom Setting drop down to "Fit in Window" Click OK
- Hyperlinks
- Exporting
- (As an Adobe PDF File) First put it in to preview mode (View > Screen Mode > Preview) to make sure everything looks correct. Go to "File > Export" Name the file. Under "Format" select "Adobe PDF (Print)". Under Adobe PDF Preset select "[High Quality Print]". If you used hyperlinks, make sure to select "Hyperlinks" from the Include section at the bottom left of the export dialogue. Press "Export" Locate the PDF file and open to double check the final document.
- Creating a New Document
- Open InDesign. Create a new file: "File > New > Document". Select document specifications such as height, margins, etc.
- Website Links
- http://www.smashingmagazine.com/2011/03/17/indesign-tips-i-wish-i-d-known-when-starting-out/
- http://help.adobe.com/archive/en/indesign/cs6/indesign_reference.pdf
- http://www.itc.edu.kh/bib/ebook/storage/AdobeInDesignCS6.pdf
- Placing Graphics
Bilder und Dateien der Mindmap
Informationen
- Beschreibung
- Adobe InDesign basics
- Erstellt von
- Nicole Gentle · Mai 2015
- Aktualisiert
- 7 Okt 2016
- Aufrufe
- 2.219
- Tags
- Bewertung