
Notizen
About Linux and Installations and Hardware
Inhalt der Notizen (6)
Seite 1
What is Linux?
Linux is a unix-like coputer OS assembled under the model of free and open source software development and distribution.
Components of Linux
Boot Loader - software that manages the boot process of your computer from when you turn it on to when the operating system starts loading
Kernel - Core of OS. Manages the CPU, Memory and all the peripheral devices connected to it.
Daemons - They are processes that lurk in the background. These are the processes which start when you start your system or when you login. They support your system, like clock or the printer service.
Shell - Provides access to the command line interface to Linux. Allows you to control all parts of the system by typing the respective commands.
Graphical Server - Subsystem which displays graphics on your monitor. Generally referred to as the "X server" or just "X".
Desktop environment - It is what the user will actually interact with. It contains applications like web browsers, file managers, games, etc.
Applications - No explanation needed all.
Why use Linux?
Free
Stable
Secure
Open source
Free to run programs for any purpose
Free to study how the program works
Free to change how the program works
Free to redistribute copies
Seite 2
What are distributions?
Collection of software
Package management system
Helps you install, upgrade and remove software
Keep your server up to date and securet
Popular Distributions
Red hat
CentOS - Free community run version of RedHat
Fedora - Free and created by RedHat. Haves updates by 6 months. Commercial and you can pay for its support.
Debian
Ubuntu
Mint
SuSe
Gentoo
Arch
Slackware
Seite 3
BIOS
BIOS - Basic input output system. It is the firmware which performs hardware initialization.
Under it, there are many tabs.
MIT - Motherboard Intelligent Tweaker - let's you modify lots of things in relation to overclocking, frequency, voltage and memory and pushing your PC to the limits and even beyond them at certain risks.
System settings - Where you can save the system time and date.
BIOS - MOST IMPORTANT FOR THE EXAM - Booting sequence to choose which OS will be loaded in which order.
Peripherals - Consists the listing and options about the hardware connected to your system like video cards, etc.
Chipset - Consists the SATA configurations.
Power - Configure power management settings. You configure the system to power on by mouse or keyboard.
Legacy BIOS Booting
BIOS will be configured to boot from a particular hard disk.
The master boot record of this disk will store the boot loader.
Boot loader would know where the kernel is on the disk and it would boot the operating system.
UEFI Booting
UEFI will call the EFI boot loader which lives on the hard disk already and not on the MBR.
This calls the kernel which boots the operation system.
UEFI is aware what the filesystem is. It even has it's own file system with few files and drives.
GNU GRUB
GRand Unified Boot loader
It is that menu which shows options like "Ubuntu", "Advanced options for Ubuntu", etc.
Press "e" to edit the commands before booting.
When you press e you will get the commands. Now majority of the lines in the starting are basically for initialising GRUB for the boot process. But if you go down, you are gonna see the two most important lines, which are
Linux - specifies which kernel would be used to boot the system.
initrd - specifies the initial RAM disk to use. Which is the temporary root file system on the memory to assist in the boot process.
Now go back and press enter to "Ubuntu". That will start Ubuntu.
Now, once the kernel has attached to the root filesystem, it executes the init process which is the first-most process whenever linux is booted and it has the pid=1
INIT systems
Now, there are many init systems to start the computer and all of its supporting processes.
The first one is "sysvinit". So, this init program was based on systemv which was the first commercial UNIX-based operating system. It was a very old system but tried and tested and it worked for the most of the parts.
But now. the operating systems like Ubuntu and Centos use a newer and better init system called "systemd". It was designed to be clean and efficient to lighten up the boot process. It adds a whole bunch of new functionalities which sysv never had such as an API and the ability to perform concurrent and parallel computation at boot time.
There is also a system called upstart which was developed by the Ubuntu developers. Now, there was a pretty religious war as to which init system to use but eventually, systemd won and Ubuntu opted for using systemd as its init system instead of its own which was upstart.
the "dmesg" command shows you the messages which were logged when the kernel booted the system. The number in the starting is the number of seconds since the system booted.
Enter the command "dmesg -T" to output the same but instead of seconds, it would be actually dates.
Seite 4
Determine and Configure Hardware settings
udev
device manager for your kernel
provides low level access to the linux device tree
It also handles the user space events which are raised when hardware is added or removed from the system including loading firmware as soon as you connect a device and so on.
Linux provides access to udev via a temporary file system called tempfs and it is mounted to /dev when you boot your system.
dbus
It is an inter-communication mechanism or a framework which allows processes to talk to each other securely and reliably.
It also provides high-level object oriented programming interface.
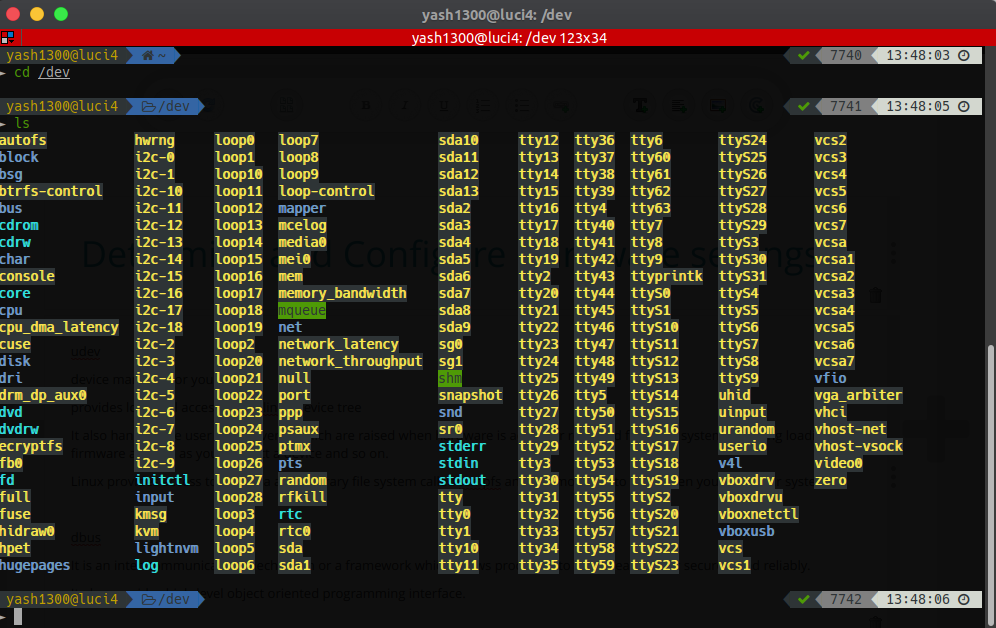
enter cd /dev to go into the dev folder
then, enter ls to get the list of files present in there. These files basically denote the components attached to your system.
Also, check out the configuration of udev by
cd /etc/udev
ls
so, the rules.d directory allows you to write custom rules for udev. So here, is the places where you write rules like what should happen when a device like usb is plugged in.
sysfs
It is a virtual filesystem which presents information about various kernel subsystems such as hardware devices, drivers and so on.
This is mounted on your system at /sys
So
cd /sys
ls
And you ll get list of directories which basically denote the respective subsystems.
procfs
It is similar to sysfs. It presents information about processes and system information from kernel.
It is mounted on your system at /proc
It can be used to interface with the kernel
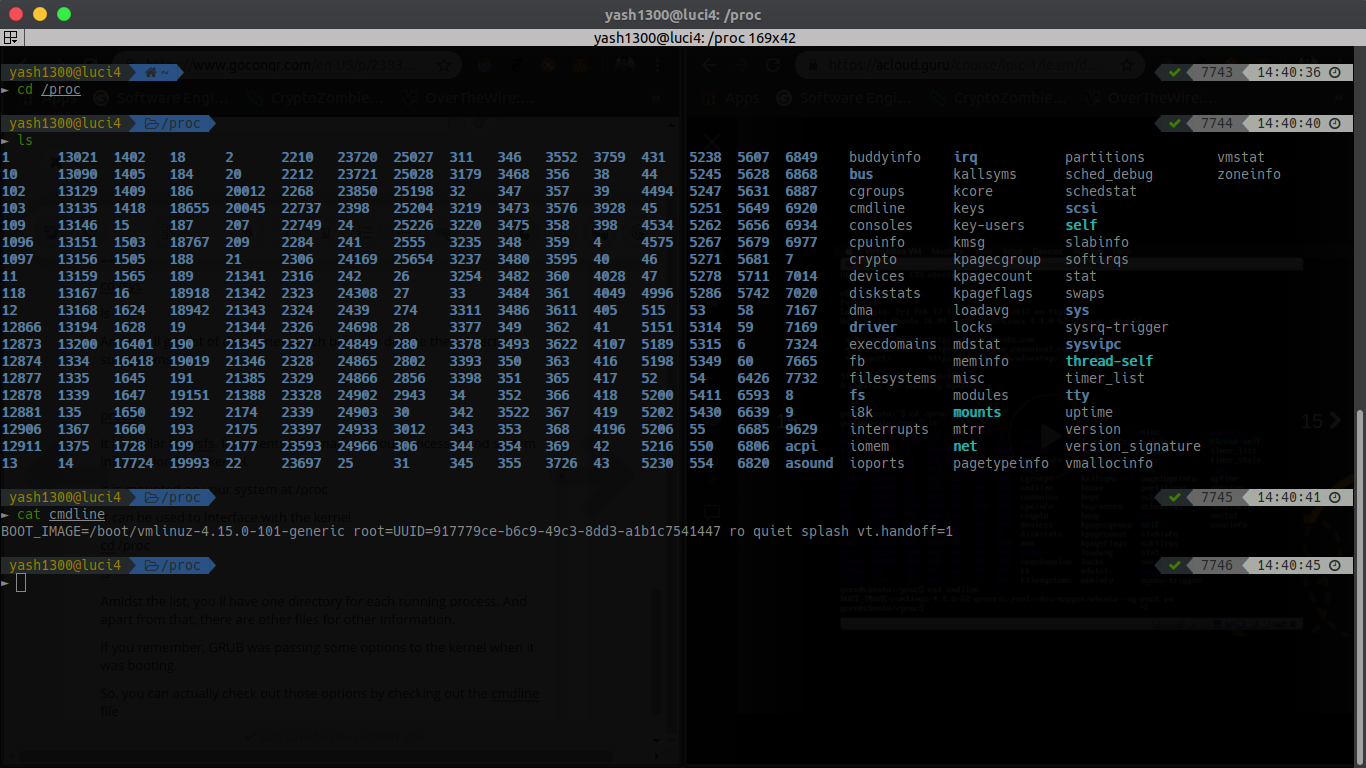
cd /proc
ls
Amidst the list, you ll have one directory for each running process. And apart from that, there are other files for other information.
If you remember, GRUB was passing some options to the kernel when it was booting.
So, you can actually check out those options by checking out the cmdline file
cat cmdline
You can also checkout the kernel/linux version by cat version or even the cpu info by cat cpuinfo
Kernel modules
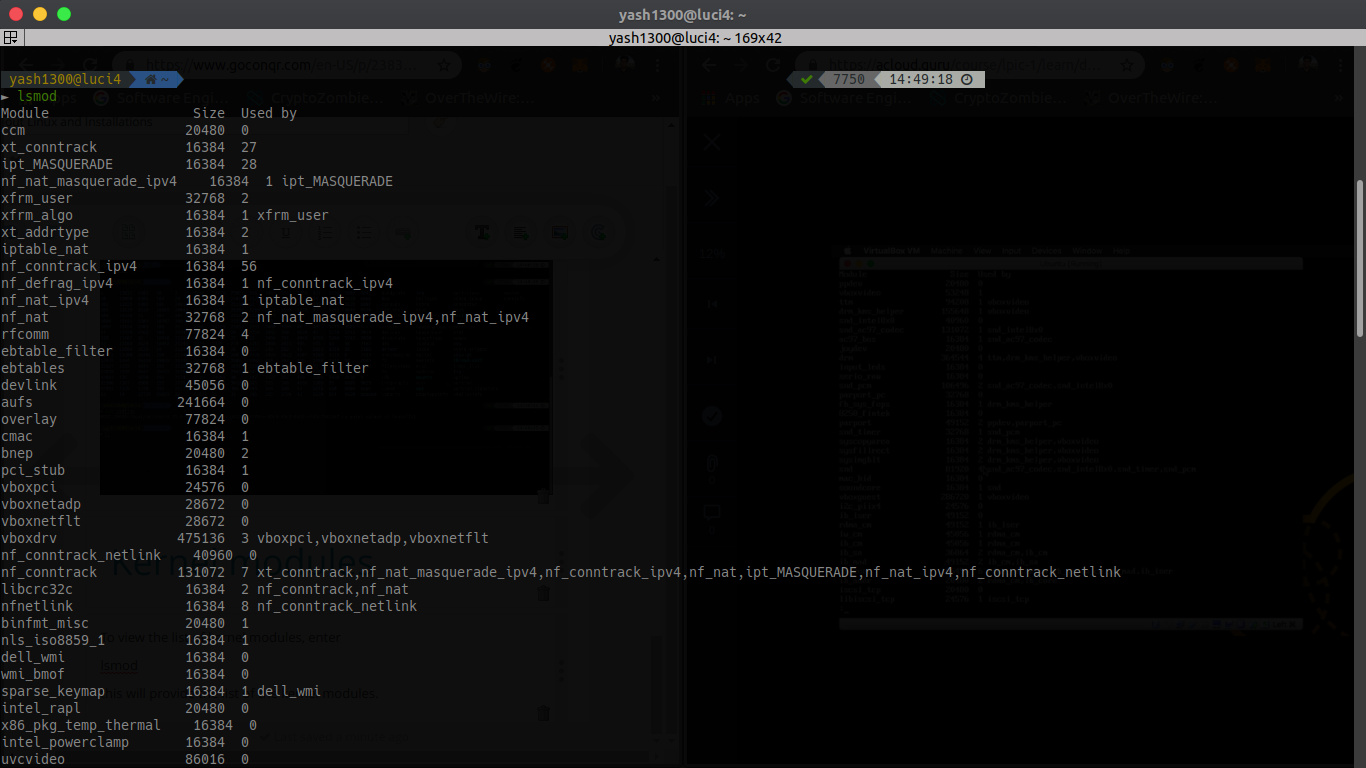
To view the list of kernel modules, enter
lsmod
this will provide the list of the kernel modules.
Introduce a module with this command
modprobe <name of the module>
Remove a module with this command
rmmod <name of the module>
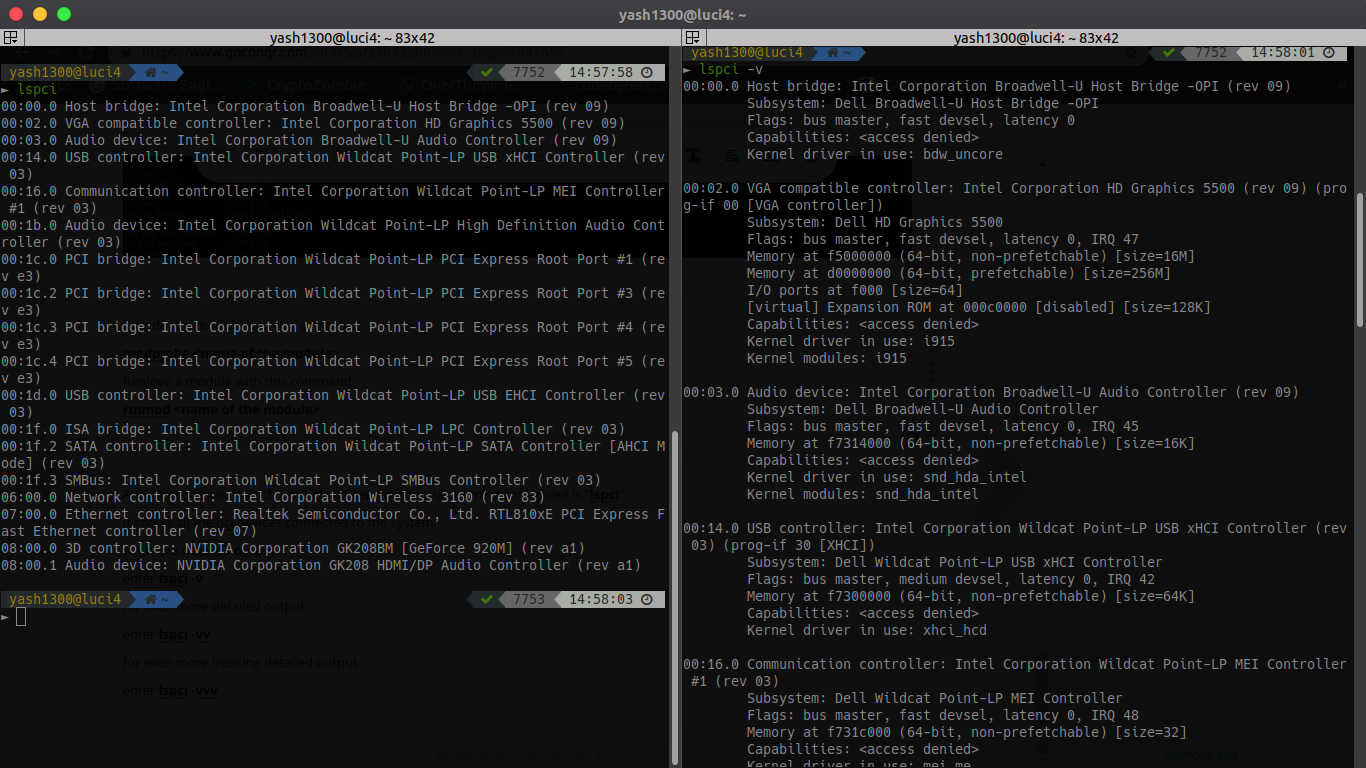
Another command which can help us see how our hardware is configured is "lspci"
It shows all the pci devices connected to the system.
For more detailed output,
enter lspci -v
for even more detailed output
enter lspci -vv
for even more freaking detailed output
enter lspci -vvv
Seite 5
Runlevels, targets and boot levels
Run levels
It is a number usually between 0 and 6, although upto 9 may be used which determines which scripts or programs are run when the command to initialise the run level is run.
This could be done by the init program during the system boot or be manually executed by you.
Steps involved with Run levels:
Whenever a linux system boots, firstly the init process is started which is actually repsonsible for running other start scripts which mainly involves intialization of your hardware, bringing up the network, starting the GUI, etc.
Now, the init first finds the default runlevel of the system so that it could run the start scripts corresponding to that run level.
A run level can simply be thought of as the state your system enters like if a system is in a single user-mode, it will have a run level 1 and so on.
Here's the list of standard linux based run levels:
0 - halt or shut down system
1 - singe user mode. Which is the mode you would have to use in case of setting the root password or recover your system if something is gone wrong.
2 - multi user mode without networking
3 - normal boot. Equivalent to multi user mode with networking.
4 - Unused/customizable. Defined by the user if they wish to create their own run level.
5 - Run level 3 + GUI display manager. Same as run level 3 but will also load a display manager if available.
6 - Reboot. If you initialise your system at run level 6, it will restart.
So, the way run levels work is they execute scripts. So, these scripts are little programs located in areas on your filesystem depending on if the system is using sysv or systemd.
Let's first talk about the sysv way to show where it all started before switching to "system" method which both ubuntu and centos now use with systemd.
sysv run levels
So, there is a file called inittab at /etc/inittab (probably you wont be able to find it because current versions of linux run on systemd and this inittab file was only a part of sysv boot process)
Anyways, it had the following lines:
id:2:initdefault: which meant that the default run level should be 2 on bootup
~~:S:wait:/sbin/sulogin: which depicted what to do in single-user mode i.e. to run /sbin/sulogin
Now, for systemd, to checkout the scripts corresponding to run levels.
Go to /etc and do ls
cd /etc
ls
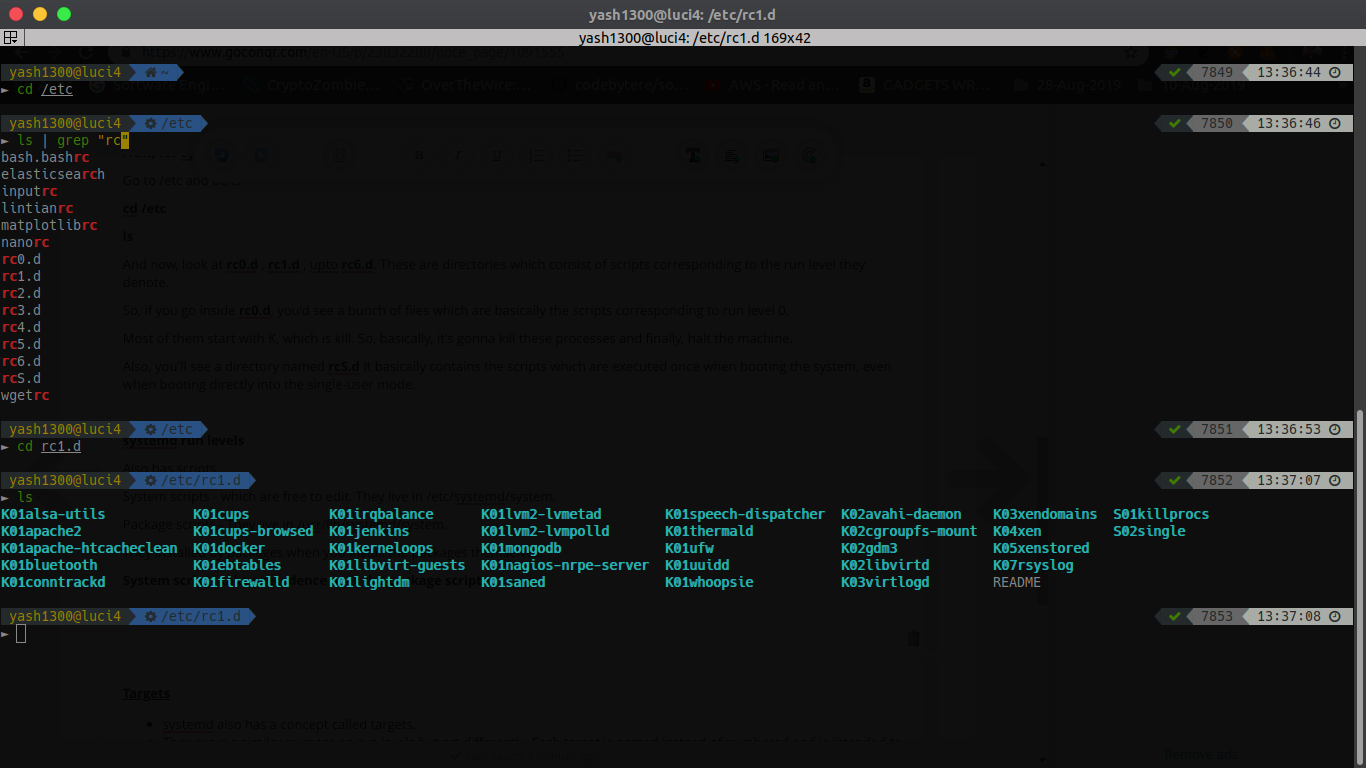
And now, look at rc0.d , rc1.d , upto rc6.d. These are directories which consist of scripts corresponding to the run level they denote.
So, if you go inside rc0.d, you'd see a bunch of files which are basically the scripts corresponding to run level 0.
Most of them start with K, which is kill. So, basically, it's gonna kill these processes and finally, halt the machine.
Also, you'll see a directory named rcS.d It basically contains the scripts which are executed once when booting the system, even when booting directly into the single-user mode.
systemd run levels
Also has scripts
System scripts - which are free to edit. They live in /etc/systemd/system.
Package scripts - They live in /usr/lib/systemd/system.
They installed by packages when you install the packages themselves.
System scripts take precedence over the package scripts.
Targets
systemd also has a concept called targets.
They serve a similar purpose as run levels but act differently. Each target is named instead of numbered and is intended to serve a purpose.
Some targets implement by implementing the services inheriting by other targets and adding additional services to it.
systemd script example for apache
Description - description of the service
After - refers to the targets which need to be started before this script is going to start its software.
ExecStart - command to start the corresponding process
ExecReload - command to reload the corresponding process
ExecStop - command to stop the corresponding process
sysvinit script example for apache
It has 100s of lines. It is extremely messy and unreadable. This is one of the biggest reasons that majority of linux distributions have moved to systemd.
Playing with some commands
to switch to some other run level, run telinit or init
So, telinit 0 or init 0 would shutdown the computer.
Also, the shutdown command schedules the shut down of the computer by 1 minute default
shutdown -r schedules a reboot for the computer in 1 minute.
To cancel, that reboot, enter shutdown -c.
If you wanna reboot now, enter the command shutdown -r now
So, usually, when you are about to shutdown or reboot a system operating in multi-user mode, it's good to inform all the users about the shutdown or reboot.
So, for that we would use the wall command.
You can only run this command as a super user.
For example, sudo wall Rebooting!
So, this broadcasts the "Rebooting!" message to all the logged in users.
systemctl - to drive systemd. Things like starting and stopping system services/targets/everything and all are done by systemctl.
Requires to be run in sudo mode while dealing with system level processes and services.
sudo systemctl status <service name>
sudo systemctl stop <service name>
sudo systemctl start <service name>
sudo systemctl restart <service name>
Also, you can change run levels/targets using systemctl too by using
sudo systemctl isolate <target - name>
for example, for rebooting through systemctl
sudo systemctl isolate reboot.target
Also, you can set the default run level/target using systemctl too by using
sudo systemctl enable <target-name>
sudo systemctl set-default <target-name>
for example, for setting multi-user mode default through systemctl
sudo systemctl enable multi-user.target
sudo systemctl set-default multi-user.target
Seite 6
Informationen
- Beschreibung
- Chapter 1 and 2 of the LPIC Course
- Erstellt von
- Yashvardhan Kukreja
- Aufrufe
- 9
- Bewertung