
Notes
Django
Content of the notes (7)
Page 1
Django Installation
Installation :
Prerequisites : Python3, Pip ( Python package Manager, like npm is for node, pip is for python)
1. pip freeze : to check all the globally installed packages
2. To install virtual environment
sudo apt-get install python3-venv
3. Creating a virtual environment
python3 -m venv ./venv ( Migrate to the project directory and execute this command)
(Executing this command creates a venv folder which manages our virtualenvironemnt)
4. Activating our virtual environment
source ./venv/bin/activate
5. Installing Django
pip install django ( installs the latest version of django)
6. Confirming the download
django-admin --version
Page 2
Django - Creating a project and deep diving
1. django-admin startproject .
==> This is used to create a django project with the name mentioned by the user and . indicates that the project should be created in the current directory.
==> Execute this command after doing cd to the project root folder
2. To start the local server => python manage.py runserver
This starts a local development server on port 8000.
3. In django everything is an app, ex. title bar, main body and footer. These are all apps.
To create an app for our django application :
python manage.py startapp [app_name]
This creates another directory for the app which contains files like views.py, urls.py etc...
Page 3
Django URLS
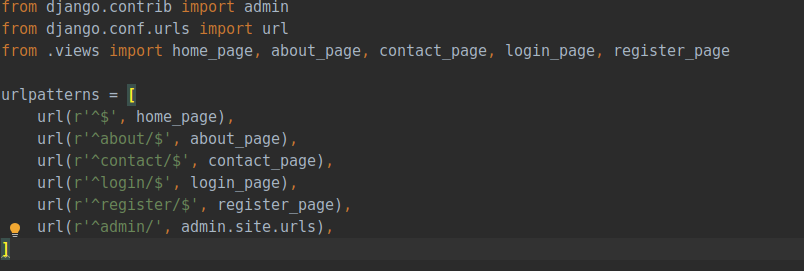
from django.contrib import admin
from django.conf.urls import url
from .views import home_page, about_page, contact_page, login_page, register_page
urlpatterns = [
url(r'^$', home_page),
url(r'^about/$', about_page),
url(r'^contact/$', contact_page),
url(r'^login/$', login_page),
url(r'^register/$', register_page),
url(r'^admin/', admin.site.urls),
]
Description of every URL Structure :
url(r'^about/$', about_page)
r -> raw
^$ -> start and end of the url
about/ -> actual url to hit
about_page -> the view name which will be triggered for this url
Page 4
Django Views
from django.shortcuts import render, redirect
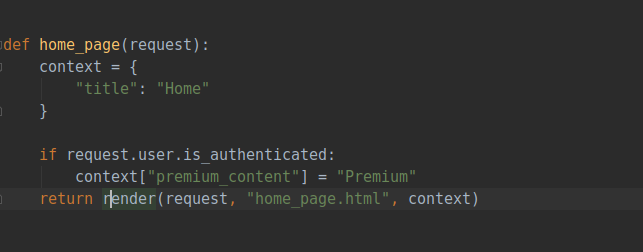
def home_page(request):
context = { "title": "Home" }
return render(request, "home_page.html", context)
==> There are two types of views in python : class based views and function based views
Here is a function based view
==> Every view takes in request as a parameter.
==> Context is a way to pass data from view to HTML templates.
Ex. Here in the context we pass "title", which can be accessed in the HTML template as {{ title }}.
==> return render(request, "home_page.html", context)
==> render is used to render the content. It takes the request,template_name, and the context as parameter.
==> If no context is specified, you can pass {} (an empty dictionary)
Page 5
Templates Setup and Creation
How to create a folder for HTML templates so that you an render out contents?
This requires setting up the templates folder.
Steps:
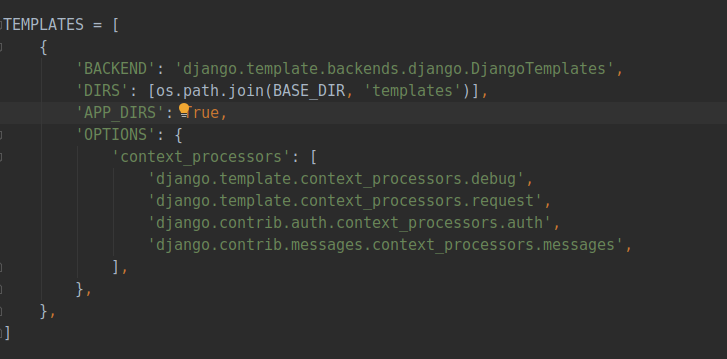
1. Go to settings.py, and search for
TEMPLATES : []
2. Here, add this line
==> 'DIRS': [os.path.join(BASE_DIR, 'templates')],
Add this line, which means that we are creating a folder at the root level, by the name "templates", and python understands, on its own, that by template here, we mean out HTML FILES
Page 6
Page 7
Django Forms
Django provides capabilities to create dynamic forms, which are easy to style, and manage. Its more mature than HTML forms, and provide more capabilities.
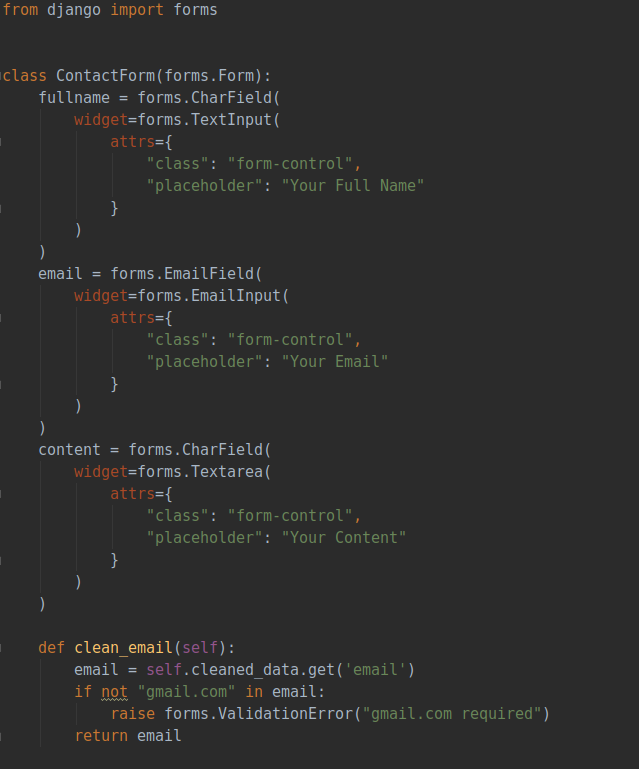
==> Here, every form field is defined seperately, with the form data type and widgets specified.
==> It's attributes are : class (CSS class to give a good look) and a placeholder text.
==> There are many other attributes also, which can be checked from Django documentation.
==> Moreover, we can also write custom validation functions like clean_email function here, to check if a particular type of id is there or not, and so on...